
1949 Chevrolet Gasser – Progress 2016 01 03
Click the picture to see a larger image
I have done what people recommend you do not do. Started a bunch of different projects and not finished any of them. The overall project becomes very overwhelming this way. I see no end in sight at this point.
The projects have gotten a little out of hand, but I can now report on a couple of them. The first one has taken some time to complete, but we are almost there now. It is the exhaust “system”.
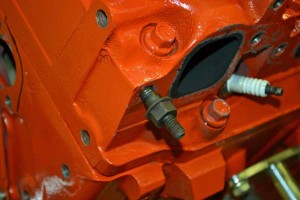
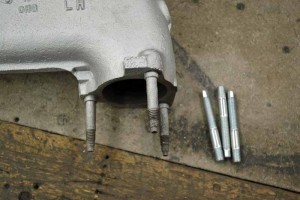
The first thing that needed to be done is to remove an exhaust manifold bolt that broke off when we stripped the engine for cleaning and painting.
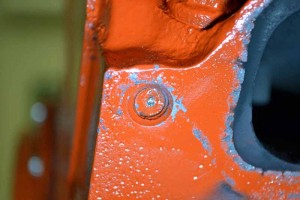 |
The first and most critical step in this process is to center punch the shaft of the broken bole that is in the head. This is much easier said than done. It is all done by eye, and as usual it is very hard to see. In this case, it was not as bad as it usually is. |
 |
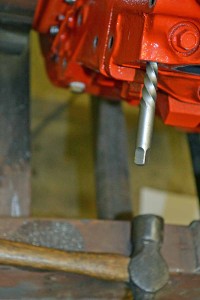
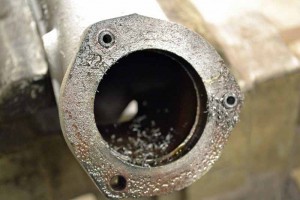
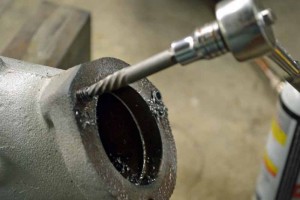
Then comes the drilling. Again in this case, there was enough room to get a straight shot at the bolt shaft. I start small and work my way up in drill bit sizes. I go as large as I can without getting into the thread in the bolt hole. |
This produced a decent pile of metal shavings and the drilling actually went well. An easy out is tapped into the hole drilled in the bolt shaft and if all goes well the bolt shaft can then be removed. This seldom works for me; I either brake the easy out off (which is really bad as the easy out is made out of hardened metal) or the easy out just spins in the hole.
 |
 |
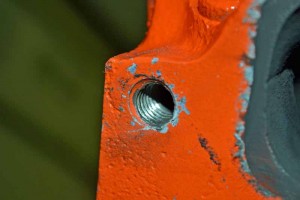 |
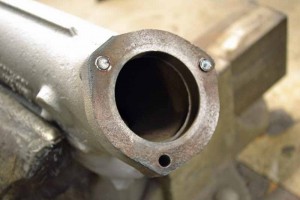
In this case the broken off bolt shaft came out and once I ran a tap down into the bolt hole the threads in the hole were nice and clean |
 |
The stock manifold bolt thread right in with fingers only. |
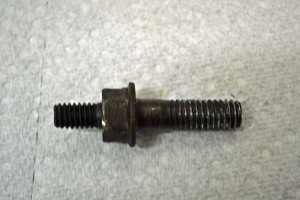 |
The stock manifold bolts are a strange setup. They have threads and bolt head like a normal bolt, but then they have a stud that comes out of the bolt head to hold the spark plug heat shield in place. I not sure I will run the heat shields as this will not be street driven and, for the short running time, I do not think I need them. Time will tell |
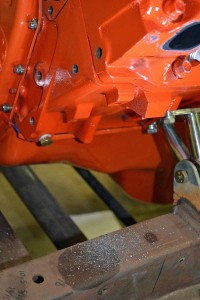
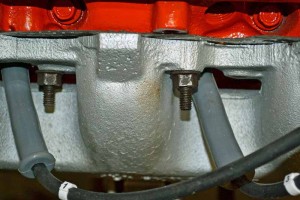
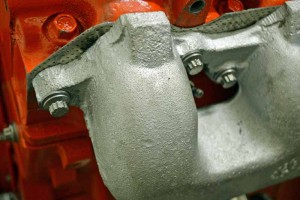
Below are two pictures, one with the stock stubs holding the exhaust manifold in place and another with 12 point stainless bolts holding the manifold in place. I really like the 12 point bolts as all you need to take most of the parts off the engine in the pits is a 3/8 inch 12 point socket. If you look though the pictures posted here you will notice that I have used these bolts to bolt just about everything back together.
 |
 |
So now we have the block prepared to accept the exhaust manifolds. The manifolds have to be prepared for the down pipes. I will not show the painting of the manifolds, but I will share a trick to having the paint remain intact on the manifolds. I first sand blast them so that they are clean. I then apply up to five very thin coats of paint. Just enough to get coverage. I then go through the heat process on the side of the can (if you have never looked the VHT (Very High Temperature) paint cans have two different processes for heat treating the pain. I have had VERY good luck with curing the paint in the oven. Follow the heat and cooling cycles and temperatures specified on the can. It really works very well.
 |
I want to replace all the studs as the treads on the studs are almost rusted away. I apply heat to the manifold (doing it carefully to heat evenly so as not to crack the manifold). |
 |
On the right manifold I got all three studs out without breaking them, but on the left one I was not as lucky. I broke off two of them. |
 |
So we are back to the same process as getting the bolt out of the head. These however were VERY easy to get to and I pretty much got the exact center of the bolt shaft when I center punched them. |
 |
Here we go with the easy out again, and once again for the first time in my life they actually worked! |
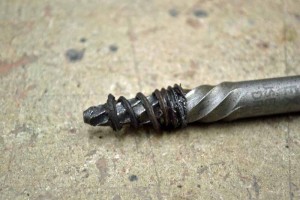 |
You cannot get much better that this, right down the center of the bolt shaft and the only thing left after drilling was the threads. I am not saying I’m good here, just very lucky! |
 |
All six studs are out |
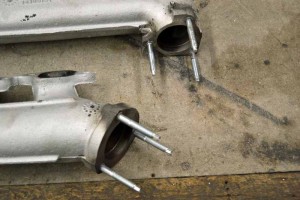 |
Now we have brand new studs to hold our brand new custom built exhaust system in place. |
Now it is time to put the down pipes together. As no one makes down pipes for a 1949 Chevrolet with a Gen IV 454, we will have to make a small modification to a set of purchased pipes to make them fit.
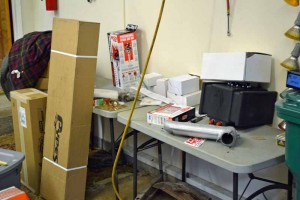 |
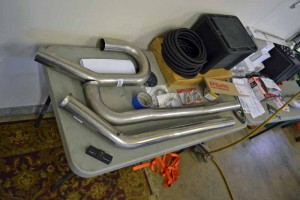
So to start this project we need parts. I ordered a generic set of down pipes for a Mark IV 454 and a generic set of bends; turns out this is not enough and I have ordered another set of bends, two four lengths of straight and some hangers (all in stainless steel) |
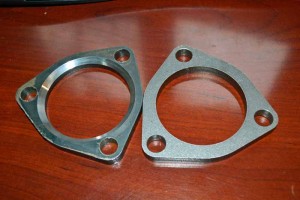 |
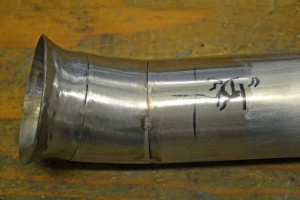
Even when ordering new parts, getting the right parts can be a challenge. In this case the down pipe flanges were not quite right, one came with the correct bevel to match the flare on the down pipe, and the other did not. Pypes was not convinced until I sent pictures. |
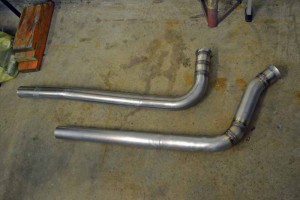
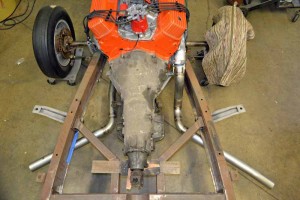
We had to change the angles and lengths of the pipes right at the exhaust manifold to get the pipes to fit. If we had not they would have hit the frame, and as we have moved the engine both back and up, they also needed to be lengthened in order to get below the frame.
 |
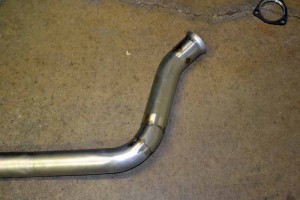 |
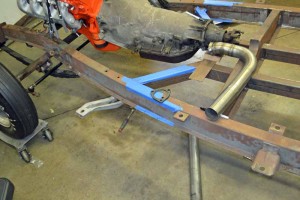
So this is what they looked like originally and what they ended up looking like after we pieced them together.
 |
 |
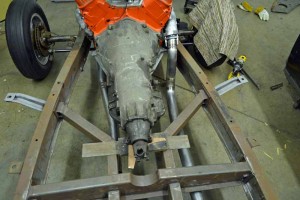 |
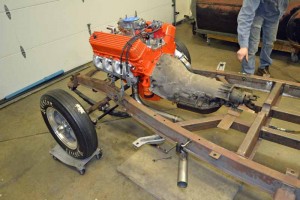
This is what they look like in the chassis. Now all that has to happen is to get the exhaust out from under the car. Child’s play compared with making the modification to get the connection to the manifolds done. |
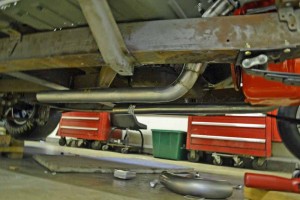
This is what they look like with the body on the chassis low at them from under the car.
 |
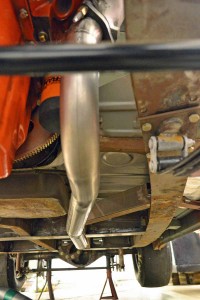 |
Now the exhaust is away from the engine, time to get it out from under the chassis. First step is to shorten the down pipes, and then weld turn outs and extensions onto the pipe
 |
 |
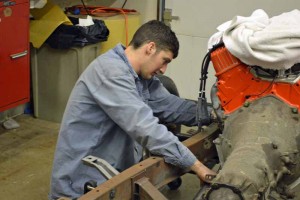 |
TIG welder extraordinary is on the job to do the fitment |
 |
The hangers are on, the job is done, well not completely, we will have to start it to see what it sounds like…tomorrow, the young man has tired me out |