1984 Jeep CJ-7 Progress 2016 06 28
Click Picture or Text for more pictures / Details
So, I have always liked the look of Tow Hooks on the front bumpers of Jeeps. I also like the look of lifting D rings, but that is another story.
I try to be sensitive to the fact that my Jeep is a survivor. So first of all, I do not want to add something the Jeep would not have had and second, if I add something, I what to do it in such a way that it does not modify the Jeep from its original condition.
So this project which could have taken 20 minutes ended up taking two days and it still is not complete. I will expand on that later.
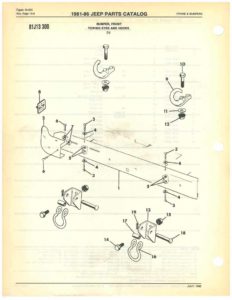 After a 20 page thread on the JeepForum and research into the 1984 Assembly manual, it was determined that the 1984 Jeep could have had Tow Hooks installed at the dealer as a dealer installed accessory. Interestingly, the Assemble manual illustration uses the wrong style Tow Hooks.
I have been looking for the Lift rings and have not been able to find them.
Any leads would be appreciated.
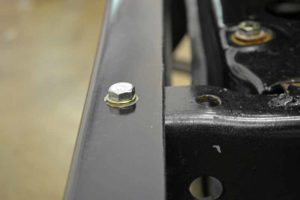
 The first problem is the holes in the Tow Hooks do not line up with the holes in the bumper and the frame of the Jeep. I believe what the dealerships did was drill new holes in the frame that matched the holes in the Tow Hooks. I could have welded up the holes in the frame and drilled new holes and no one would know but me, probably. Oh yes, Tow Hooks came in chrome and semi-gloss black. I had a set of chrome Tow Hooks, but they just did not look right to me
 I had to come up with a way to bolt the Tow Hooks to the frame without modifying the frame. “They” actually have this same problem when bolting mismatched transmission to motor and what they do is make an interface plate
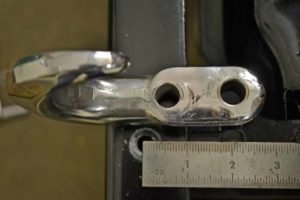
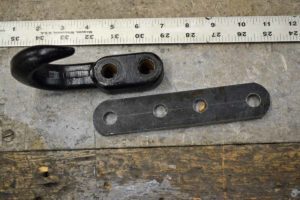
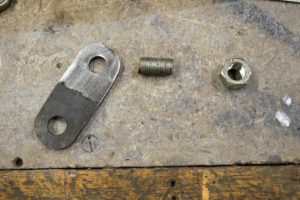
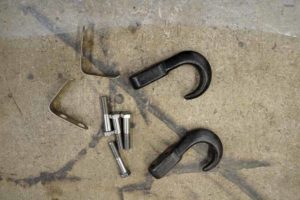 I was able to find some original hooks, bolts, and keepers, so I started with these
 I had some 5/16 plate that I added to the mix and we are on our way
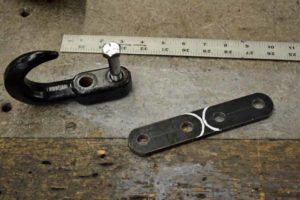
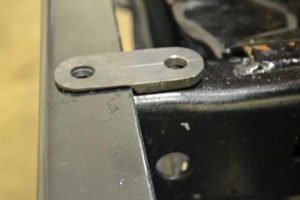
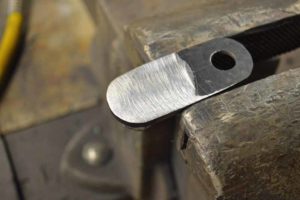
 I cut it down to slightly more than twice the length that I needed and used the curvature of the end of the Tow Hook to round off the ends of the plate. By using the same curvature, I hope it makes it look like part of the original Tow Hook
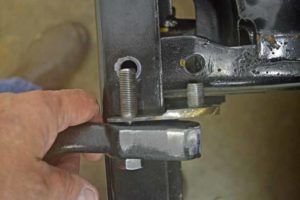
 First test fit on the Jeep with the bumper removed
 I have now drilled the second set of holes in the plate. These holes line up with the holes currently on the vehicle. They do not line up with the holes in the Tow Hooks.
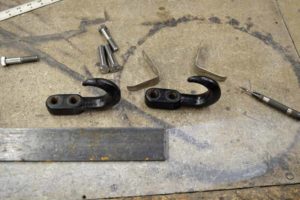
 Now it is time to separate the single piece into the two pieces I need, one for each Tow Hook. I am again using the curvature of the end of the Tow Hook.
 A little tweaking of the plates to exactly match the shape and size of the Tow Hook. I bolted the plate to the Tow Hook and ground the ends and sides to match that of the Tow Hook. I thought about welding the plate to the Tow Hook and grinding the weld down so that it looked like one piece.
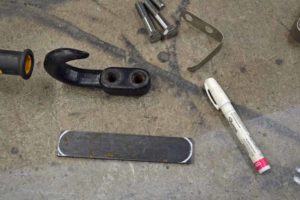
 I decided against that so that the Tow Hooks remain in their original configuration. Now it is time to make a provision to bolt the rear of the Tow Hook to the plate
 Oops, I need to make a step in the plate so that it sits flat when laid across the bumper and transitions to the frame of the Jeep. The original Tow Hook accessory kit contained spacers to be used between the base of the Tow Hook and the frame of the Jeep
 So now we have to address two problems: how to fasten the rear of the Tow Hook to the plate without drilling a new hole in the frame and address the problem of there being no room for the head of the bolt for the bolt I’ll use to bolt the rear of the plate to the frame of the Jeep
 This will work for the rear bolt on the plate. The top of the plate is flat so the Tow Hook can sit on it and the ½ X 20 stud will fit in the hole in the frame
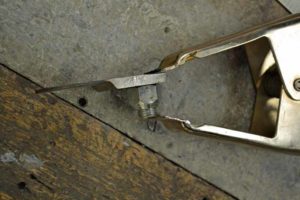
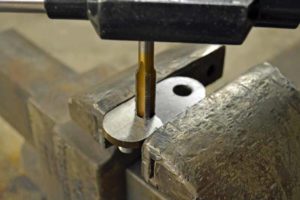
So how did I accomplish this magic trick? First we need the components (the plate with the holes with the right spacing, the threads cut off a ½ X 20 bolts, and a nut). Second, what is left of the bolt (the threads) is put into the hole and the nut is screwed onto the stud and clamped there with an 1/8 inch gap between the top of the treads and the surface of the plate. Third, using a lot of heat for good penetration and in several steps a rosette weld is built up on the top side of the plate. Fourth, the weld is carefully ground down so as to remove as little as possible of the plate to see where addition weld needs to be built up to get a smooth surface.
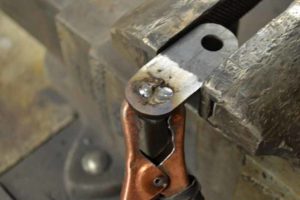
 Fifth and final welding and grinding produces a smooth surface the Tow Hook can sit one and a stud that protrudes through the hole in the frame to bolt the rear of the plate to the frame
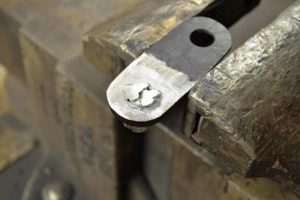
 Ok, we are getting close. We now have the front bolt that will through-bolt through the Tow Hook, through the adapter plate, through the bumper, and finally through the Jeep frame. Lots of good healthy steel to hold the front of the Tow Hook in place. We have a rear stud welded into 5/16 in thick plate that bolts through the Jeep frame. Now we need something to bolt the rear of the Tow Hook to the plate.
 I want it to look like a stock install. I drill a hole in the 5/16 inch plate in line with the rear hole on the Tow Hook and taped it for ½ X 20 bolt. That way I end up with two bolt heads on the surface of the Tow Hook to give the illusion that that is how the Tow Hook is bolted to the Jeep
 Time to prepare the pieces for finishing. There is nothing better to stand up to the elements then a Powder Coat finish. So first step is to sandblast all the parts.
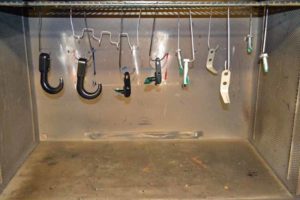 Into the oven they go. The Tow Hooks become Semi-Gloss Black; the Keepers and bolt heads become Eastwood’s Detail Gray (I could not resist adding clear gloss to the Keepers and Bolt heads) Eastwood Detail Gray is very close in appearance to bare metal
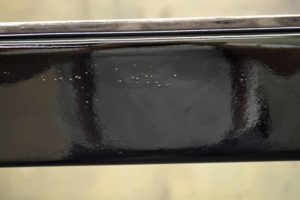
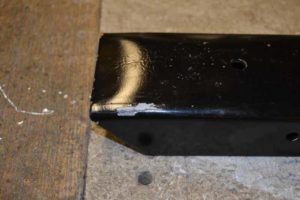 So now I am getting close (well, not so much) when I went to put the bumper back on didn’t I drop it and chip the paint!
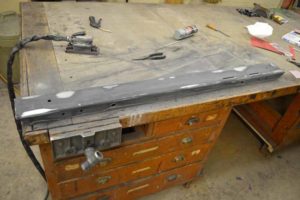
I didn’t want to do it and it was 7:30 at night, but I sanded down the bumper, ran to the auto parts store and bought some paint
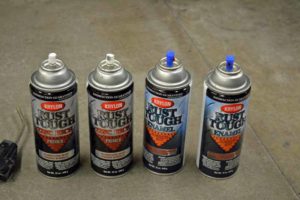
 I carefully cleaned and followed the paint instructions on wait times. I am usually pretty good with rattle cans. I do not like this paint, it bubbled in a area. If it would have fit in my oven it would have gotten powder coated. That is the reflection of my belly and suspenders you see, and of course the offending bubbles. I HATE paint.
 I let it dry overnight (said you could handle it in one hour, I gave it eight) The paint was still soft and I have a thumb print in it. I think it will come out.
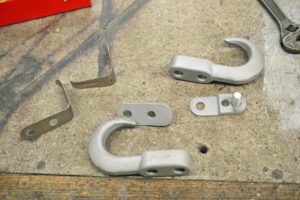
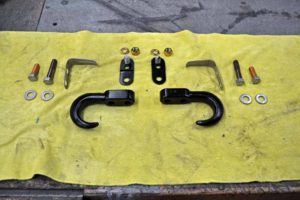 Now we are really getting close to the end, I promise. Here are all the parts finished
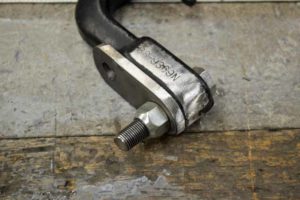
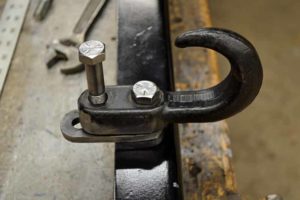
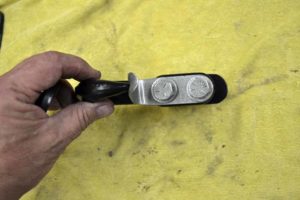
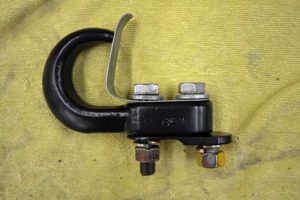 An assembled Tow Hook. The Tow Hook is still in its original form. The bolts that hold the Two Hook to the jeep are in the right spacing so that the Jeep does not have to be modified. My fingers are beginning to hurt.
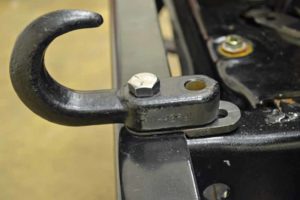
 Top view: I need to get a Grade 8 Bolt for the front of the Tow Hook, but because of the way this is put together I can do that at any time, Unbolt the front bolt and install the new bolt
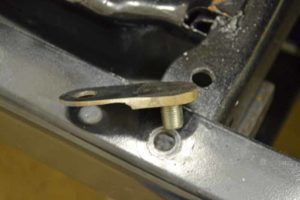
 Bottom side of the plate with Grade 8 lock washers and nuts. You can also see the bottom of the rear bolt on the Tow Hook cut flash with the bottom of the plate.
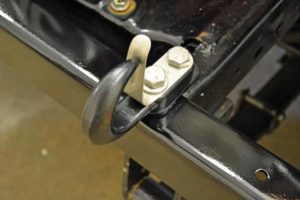
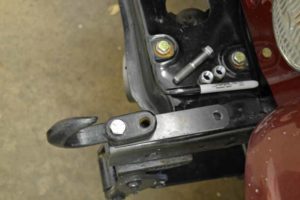
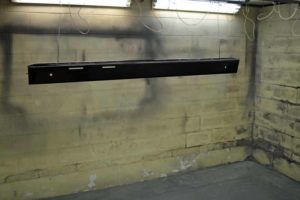
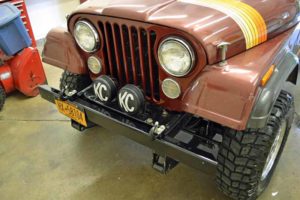 Bumper back on the Jeep with Tow Hooks mounted
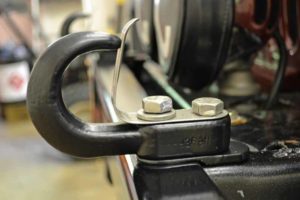
Close up of the Tow Hooks mounted to the Jeep. Not bad, I cut the rear bolts too short so I could not put the washer under the bolt head to match the front one. I will have to get two more bolts, cut them at the right length and install them. Again because of the way I built the plate, I can remove the front bolt and install the new one, then remove the rear one and install those, and the plate itself does not have to be removed. I may just leave the anodized bolt heads alone to draw attention away from the ¾ of an inch of plate that stick out the back of the Tow Hooks