1997 American Dream 2016 04 21 Blinds
Click picture to see larger one
Ok, here we go.
This project has its roots in a Caledonia RV repair failure (this was back when I was trying to be lazy and have work done for me rather than doing it myself), and there were three failures in this one topic.
The project started out as the replacement of old rope lighting that was in the Motor Home. Many of the lights in the rope lighting had burnt out over the years and I tasked Caledonia RV to replace all the rope lighting in the Motor Home.
To accomplish this the blind valances had to be taken down in order to replace the rope lights in the valances.
When the valances were reinstalled the blinds in the valances were not secured properly and when we went to use the blinds they fell out of the valances. They were returned to Caledonia RV and they put them back into the valances.
When we used the blinds for the second time they fell out of the valance for a second time. This time the rod that controls the pitch of the valance broke off in the blind mechanism and could not be repaired.
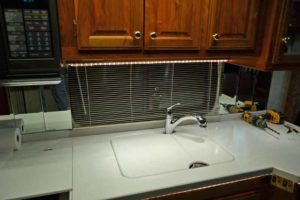
Caledonia RV refunded the cost of the blind. It has been broken since then and is now time to replace all the blinds in the front living space (the two over the coaches, the one over the dining room table and the one in back of the sink).
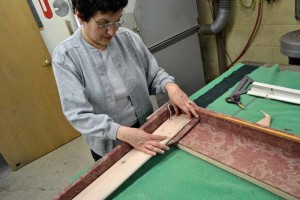
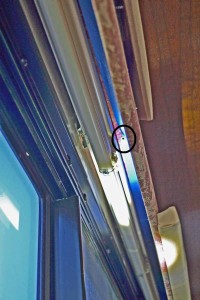
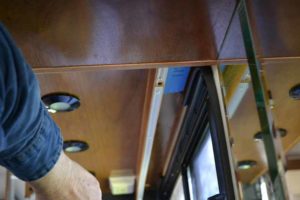
 I am using this picture as a starting point. It is actually a picture of the valances going back up, but let’s pretend that this is the start of the project and I am removing the screws which holds the valance to the overhead cabinets.
These valances have been removed and replaced a number of times over the years.
Caledonia RV had them down several times. SunCoast Design had them down when the windows were defogged.
What this means is many of the screws were over driven and buried deep into the upholstery and very difficult to find. Also the number of supporting screws varied per valance and some were stripped.
 This was a combined effort of both my better half and myself, and we did finally get the valances out and onto the work bench.
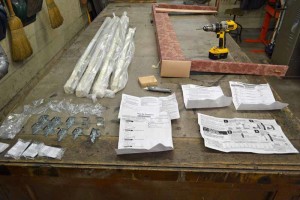
The Blinds that were in the valances turned out to be Belle blinds and are still available with the exact same options.
We ordered the new blinds through Home Depot, but elected not to put the color keyed stripes in the blind field. It was just to retro, so the blind field is all one color.
I have hung a lot of shades, blinds, curtains over the years and have yet to use the screws that came with the hardware. They are either to wimpy, too long, or just not enough screws sent with the hardware.
In this case the screws were too long and would have come through the top of the valance.
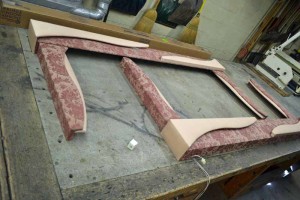
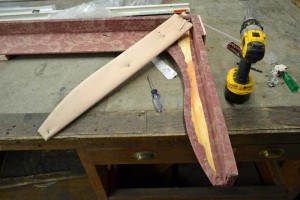
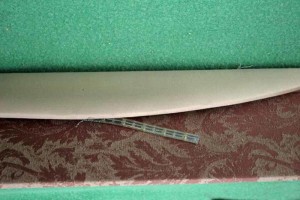
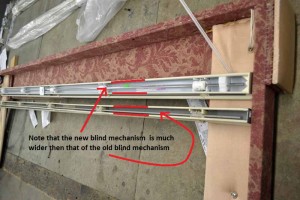 Here was a surprise. Even though we ordered the exact same blind at some point in the evolution of this model of blinds they changed the size of the blind mechanism to be much wider than the original, however the size of the blind blades remained the correct size. Here you see one of the old blinds laid beside one of the new blinds.
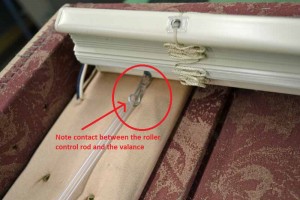 This created a problem with the roller control rod in that if installed without doing anything to the valance the control rod would be pressed up against the valance.
What to do, what to do. I know what we need, a slight modification!
The valance is built up of multiple layers of upholstery and backing boards. In the area that there is contact there are three layers of backing boards and upholstery. So let’s remove the first layer.
We have to be careful what we do here so that we do not remove strength from the valance and the inside of the valance might be visible through the window, although the shading of the window would make that unlikely.

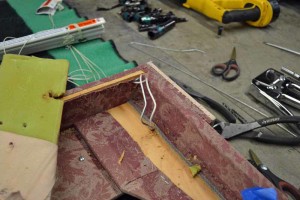
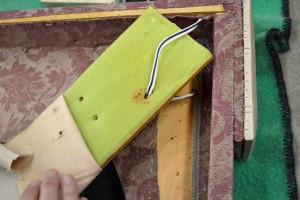 Now we have another problem. The wire for the rope accent light in the valance goes through this board.
We carefully removed the staples and pulled back the upholstery (remember this upholstery is 20 years old and been exposed to sun that long).
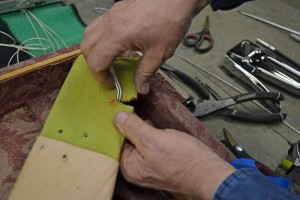
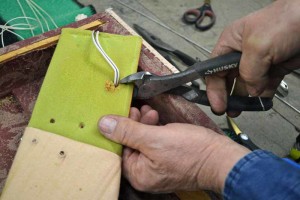 I elected to take the easy route here. This is ¼ in thick plywood. I used a large pair of Dykes (official name is diagonal wire cutters abbreviated to Dykes), to cut a path to remove the wire from the backing board. This part of the backing board will be cut away to create clearance to the roller control rod.
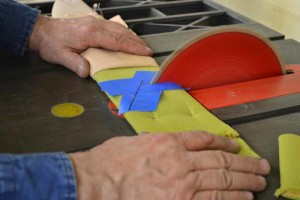
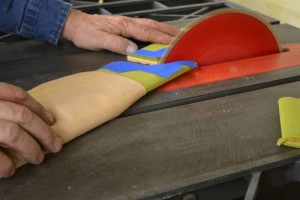
To the manly tool, the table saw. Note the blade is all the way up so I have very little cut through in the crotch of the angle.
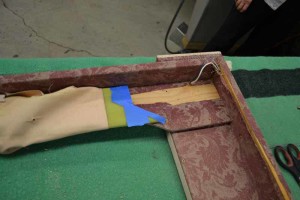 So using the bottom screw in the backing board to put the piece back in the correct position we now have a void where the control rod will hang without binding. This area might be visible from the outside of the motor home.
 So the better half is brought in for her expertise in the handling of cloth.
The upholstery is folded back into place minus the backing board and stapled to the secondary layer so if viewed from the outside it looks correct.
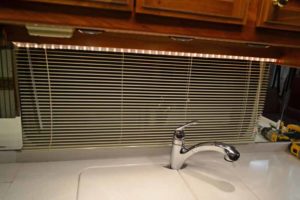
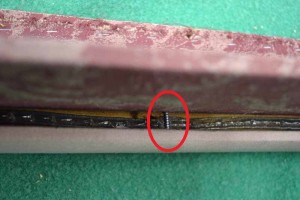
 This is the best I could do to show that now there is ¼ inch of clearance between the control rod and the valance.
 Another problem that Caledonia RV did not seem to be able to resolve.
After the new rope light was put into the valance what would happen is the rope light would fall out of the valance and become visible.
They made several different attempts to resolve this problem.
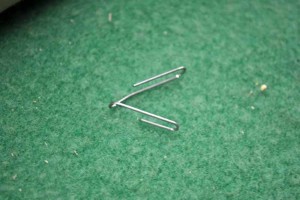
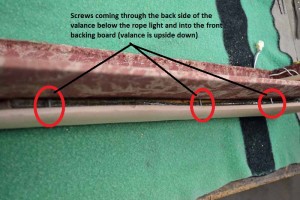
My wife watched these ropes droop as we rolled down the road and tried to stop them fully hanging down by using bent paper clips to hold them up. A quick little attempt to prevent a total loss of our investment. You can imagine what happened as we traveled down the highway with arithmetic bumps — she kept jumping up to adjust paper clips.
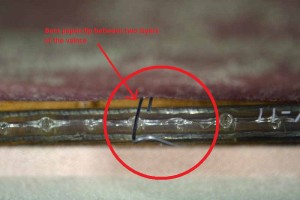
So what I did was drill holes through the rear of the rear backing board, run screws through the holes and then screw them into the back of the front backing board below the rope light so that when the valance is in place the rope light will rest on the screws (in these pictures the valance is upside down)
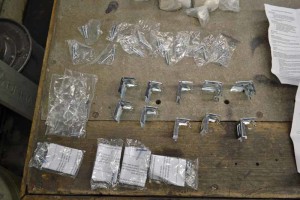
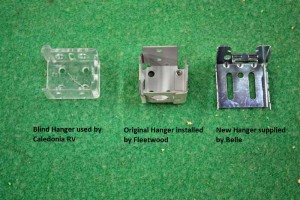 Time to make sure we do not have a repeat of the problem of the blinds falling out of the valance when used. Caledonia RV elected to use plastic brackets to hold the blinds in the valances, when they reinstalled the blinds. Plastic brackets were just not up to the task of keeping the blinds in place.
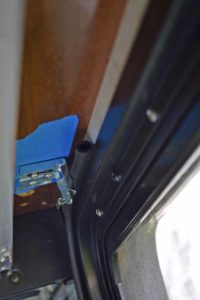
The instructions that came with the blinds (yes, I actually now, after many years, read the instructions, and then ignore them) state that the brackets that hold the blinds in place were to be installed over the top of the blind roller mechanism. I test fitted them and found that the brackets were not wide enough to provide clearance side to side on those rollers. I offset the brackets (ignored the instructions).
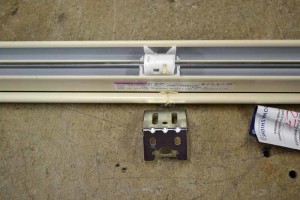
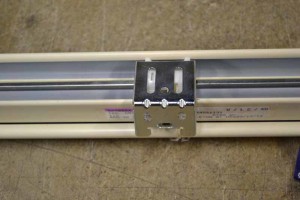
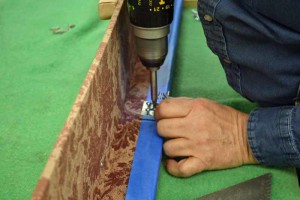 I found several cases where only one screw was used to hold the brackets in place. I used not one, not two, not three, but four screws on each bracket that I installed. The blue tape was used so that marks could be made and seen to correctly position the brackets.
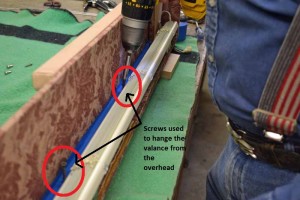 As I mentioned earlier, these valances have been removed and installed multiple times and the number and spacing of the valance mount screws was not consistent. Using the blue tape again, I marked out evenly spaced mounting screws, five across the front, one on each side and two on the bottom leg of each valance.
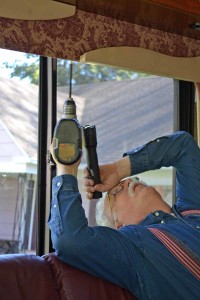
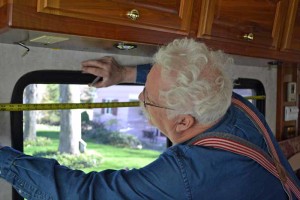 The center of each window was located, the valances were evenly spaced, and while my better half held them in place, I contorted myself to see the mounting screws, and screwed the valances in place. Neither blinds nor the valance will be falling down again.
The blue tape really helped to make the screws visible when trying to locate them with the valance over my head.
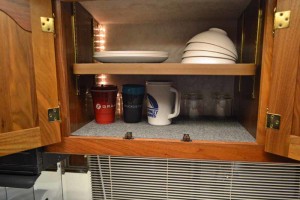
On to the last blind, the one behind the sink. This blind had to done in place as the wood fascia could not be removed. In addition there was a rope light on the bottom edge of the fascia.
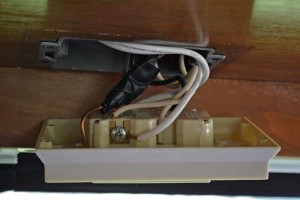
This light had to be removed in order to do the blind. In order to remove the rope light the inside bottom of the cabinet above the sink had to be removed.

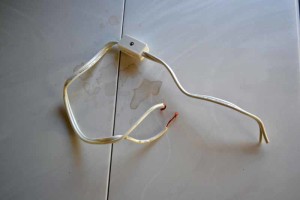
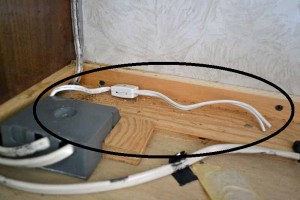 Lurking inside the cabinet below the bottom was a wire that was cut and left live when Caledonia RV removed the old rope light and installed the new one. Yes, there is an inline switch (and who knows if it was on or off), but you just do not leave cut off live wires buried in cabinets. I removed it.
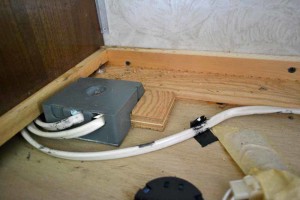
 When I pulled the plug out of the box to remove the cut wire I found more crap wiring.
This however cannot be placed on the heads of Caledonia RV as I believe this to be original to the Motor Home.
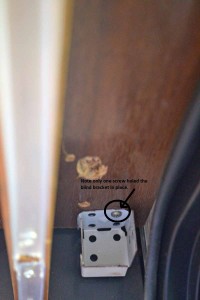 Time to remove the old blind brackets, and here we found a single screw holding the original blind bracket up.
Not the way I will be leaving it.
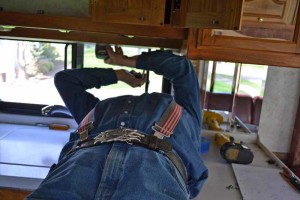
This was an extremely easy location to work in and a great way to stretch your back muscles. All you have to do is lean over backwards across the counter and work in a space directly above your head so that everything falls right in your face.
Having the better half there to hand tools and hardware REALLY helped.

Once again blue tape was used to make visible the marks to locate the brackets and to drill the holes.

 Four screws per bracket.
Here the screws are only loosely in place, I had to take a break as my back was sending me messages that if I did not take a break it would be talking seriously to me later.
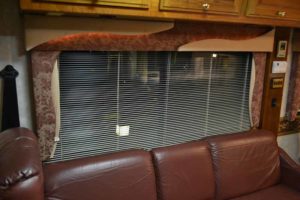
Done, four new blinds up, rope lights secured and working.
The control rod is hanging at an angle as we are currently in our driveway which has quite a slope to it.