
1997 American Dream 2016 04 23 Floor Air Diffusers
Click picture to see larger one
My wife made a request that I address the broken floor air diffusers. This is something that I have been meaning to do, but just have not gotten to it.
More than them being broken (although that bugged me also), when you walked into the Motor Home and looked at the length of the Motor Home, the diffusers were pointing every which way. It just looked bad.
Also I have to also say that when we had the new carpet installed we made a huge mistake in going with a light color. It shows every bit of dirt, and is a real pain to keep presentable.
At some point we will have to rip this carpet back out and do something different. My wife wants to put wood in.
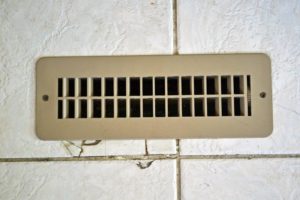
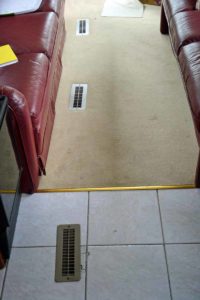 This is the before shot with the old diffusers still in the floor. Note the diffuser in the foreground and the broken tile around it. Also it is crooked.
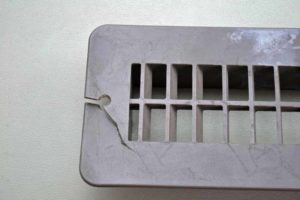
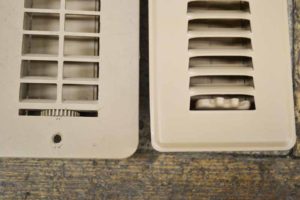
The old diffusers are also cracked and a number of them are missing their guts.
The diffuser in the driver area would blow shut, we were wedging paper into the vanes to keep it open
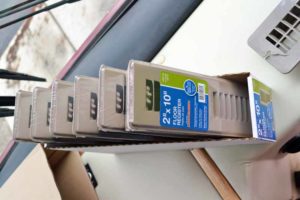 First step is to get new ones, and of course I could not find the same ones. These are metal, the old ones were plastic and have a wider shoulder. They were cheap enough so that I would not have any qualms at replacing them again if I find something better.
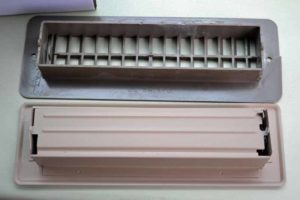
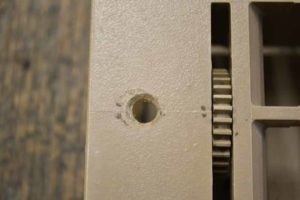
The old diffusers were screwed into the floor, I suspect that was to keep them in place as you travel down the road. The holes in the old diffusers appear to have been “homemade”. The new diffusers did not have holes in them.
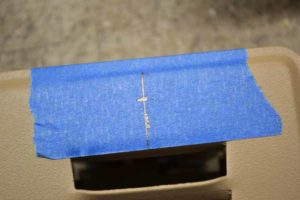
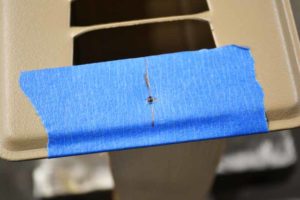
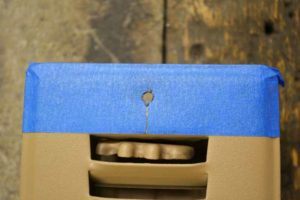
So, I carefully marked where I wanted the holes (I needed them as far towards the edge as I could get but still have the head of the screw sit flat on the surface of the diffuser. They need to be as close to the edge so that the screws have a change at biting into the wood floor below the diffuser and not end up going into the void of the open duct.
So now I have to center punch where the hole is supposed to be. The problem is that the surface where I need to center punch is raised and if I do not support the back of the top of the diffuser it will bend. So I came up with a quick and dirty jig to allow me to do that.
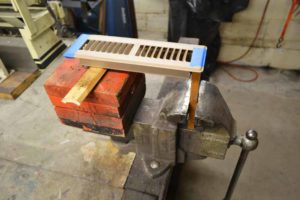
This allowed for a nice crisp center punch which allowed for a nice centered hole with no wondering of the drill.
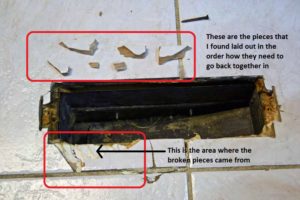
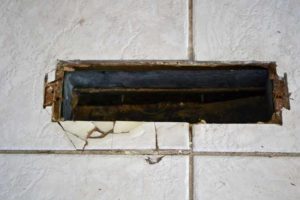
The tile around the first diffuser in the dining area was broken out. We will eventually do something with this floor, but for now I just want to make the best of what we have. I thought of a number of different ways to fasten the broken pieces back to the floor, but finally went with embedding the piece in epoxy. I was able to “flow” the epoxy over the top of the broken pieces so that we do not cut our feet when we walk around in the Motor Home (generally we do not wear shoes in the Motor Home). It is not pretty, but will work until we have time to do something more “finished”.
The area where the broken pieces go is towards the bottom of the duct hole and the broken pieces are laid out in the orientation of how they go back together. I did not find all the pieces.
 Of the six original plastic diffusers only two were still in good condition. I used those two on the tile floor in the kitchen area. They have a wider shoulder and cover more of the floor. A lot of the broken tile is covered by the old diffuser
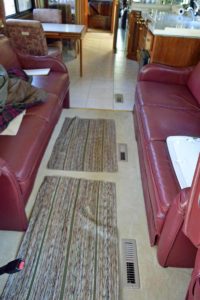 Although the diffusers are not perfectly straight, they are a LOT better than what they were. They are all screwed into the underlayment and all no function (can be shut off is so desired).