
1997 American Dream 2016 08 02 Part 2
Click picture to see larger one
Part 2, recovery from my first mistake, fitment of the new unit.
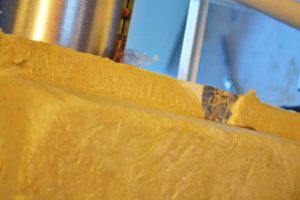
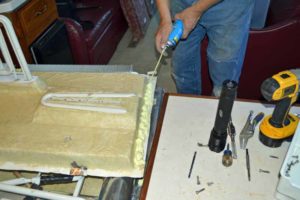
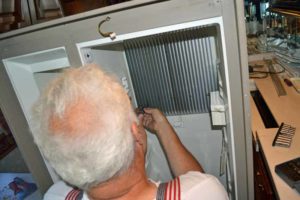
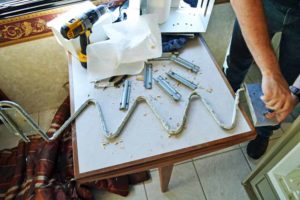 First things first, let’s fix the mistake I made by removing and disassembling the secondary cooling coil in the freezer compartment. The old heat transfer mastic was scraped off the coil (I used my fingers as it just crumbed off) and new mastic was applied. My goal was to use up all of the mastic so I applied a heavy bead
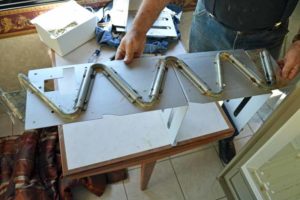
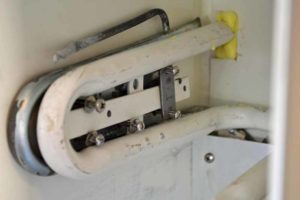
The rear brackets were positioned and screwed on through the front side (half of the freezer shelves are part of the backing plate (heat sink)). The unit was flipped over and the remaining freezer shelves were screwed to the backing plate/secondary cooling coil and the mistake has been erased.
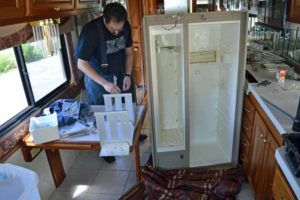
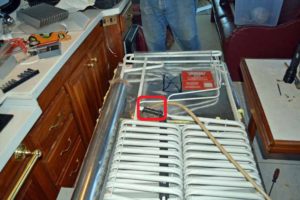
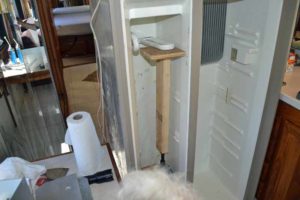
Now we can move forward. The fit is important so let’s test fit before we do anything. From this side it looks pretty good. Right top hole for the mount of the cooling unit lined up, a little tweek to the left bracket and that hole lined up as well. The middle hole on the right side was off by about a ½ inch and the bottom holes were an inch too high. We can deal with that, we can pull the unit over far enough to get the middle screw to line up, a self-tapping screw was used in the bottom. We removed all those screws but left the two top screws in place. We stood the unit up to take a look inside.
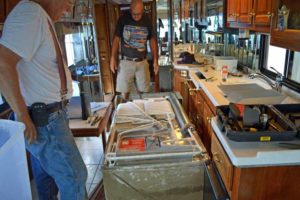
There was quite a large gap between the backs of the refrigerator and freezer compartments and the new cooling unit.
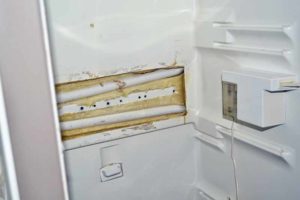

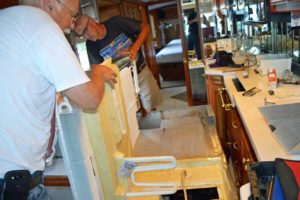
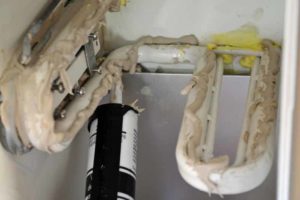
 I placed a call to JC Refrigeration and left a message. In the meantime, we pulled the unit back out and took a look at it again. Noticed that there was foam insulation that had appeared to spread out along the edge. We chipped it away to see if we could get the unit to sit down into the recess on the back of the refrigerator box. Note in the last picture the entire outside edge all the way around the insert is now clean down to the foil backing.

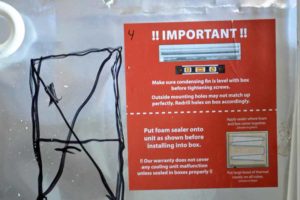
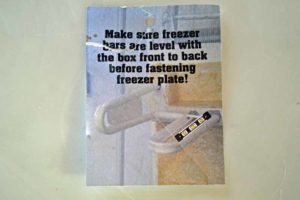
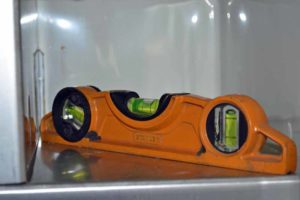
Below are the only instructions I received with the cooling unit. I will explain the marked up back in a little bit. The red instructions state 1) to foam the mating surfaces of the cooling unit plug and the refrigerator box, not doing so will void the warranty, 2) the condenser coil on the top of the cooling unit must be level. The silver tag was hanging from the freezer coils and state that they must be level front to back.
In order to do this the motor home must be level to start with as I suggested in the preliminary comments in part 1.
JC Refrigeration did call back and said that a ¾ inch gap is ok, and that when the refrigerator fins are screwed into the cooling unit it will draw the cooling coil into contact with the fins.
I test fitted the machine screws we removed and they did not screw into the cooling unit. I tapped all the holes to number 10 X 32
So following the instructions we applied foam to the mating surfaces and set the cooling unit into the back of the refrigerator box. JC Refrigeration said you have a 30 minute work time with the foam.
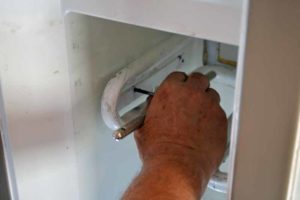
When you flip the cooling unit over you need to feed the drain tube through the hole in the cooling unit. Be careful not to kink the hose.
Once the unit was set into the foam we wiped the excess foam that squeezed out off (this stuff is sticky).
 Using the same philosophy (use up all the heat transfer mastic) per the instructions on the red label the mastic was applied heavily to the refrigerator cooling coil, and the refrigerator fins were screwed to the bracket on the cooling unit.
Screwing in the fins pulled the cooling unit up to the fins in the refrigerator as JC Refrigeration said it would.

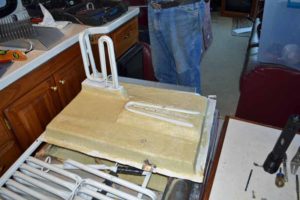
 Following the instructions on the silver label the freezer coil needed to be leveled front to back. I could do this by hand so I cut a piece of plywood for the floor of the freezer, used a bottle jack and 2X4 to bend the coil up by ½ inch to get it to be level


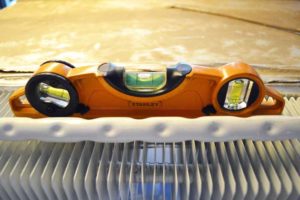 The second step to leveling the cooling unit is out on the back side so it had to be stood up again. Per the instructions, the condensor must also be level. Turned out that it was level and no changes needed to be made.
 The holes in the new coils brackets did not line up with the interior freezer box (I used the two Philips screws that go through the plate and into the refrigerator box to position the interior plating). With the interior cover screwed into place, I marked where the side holes wanted to be in the cooling coil bracket and drilled and tapped them
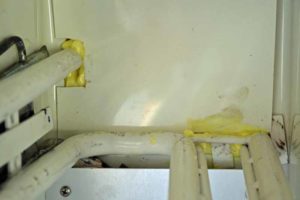 The instructions did not say to do this, but I used some of the foam to fill the back of the freezer where the coil comes in and used it to glue the interior plastic cover in place
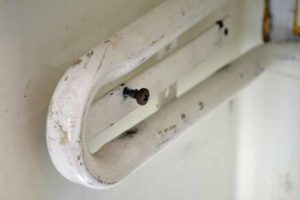
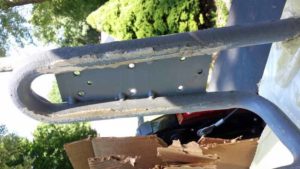
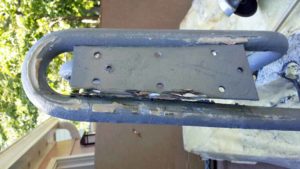
The plate between the vertical coils in the freezer was different from the plate in the original cooling unit. There were no holes or material to put the six machine screws back to bolt the secondary cooling coil to the new cooling units coil. Below is what the original bracket looked like. I cut it out of the original unit and then cut that plate into straps so that I had a place to run the machine screws through to pull the secondary cooling coil to the freezer coil.
 The cut down “strap” I made from the original bracket did not fit between the coils. The new coils are either bigger in diameter or closer together
So I used washers so that I could caught the center bracket in the new coil and was able to use the “strap” I cut from the original bracket to span the rear.
This coil on the new cooling unit really wanted to be ½ inch further into the compartment. The screw holes for the interior pieces would have lined up and the secondary cooling cool would not have over hung the front. Installing the refrigerator fins did not pull the freezer coil further into the freezer compartment.
I used the remainder of the heat transfer mastic between the primary and secondary coils and between the primary coil and the interior shoveling pieces.
 Interior freezer box pieces bolted up
Inside of the refrigerator is completed, time to move back to the rear of the unit. This would be a good place to break and end part 2, and is the end of day two of the removal and install of this unit. Next part will be the assembly of the rear of the cooling unit and the explanation of the marked up area on the rear of the box.