
1997 American Dream 2016 08 02 Part 3
Click picture to see larger one
Part 3, or day three of the removal/install, completing the back side of the cooling unit, installing it into the cabinet, and a test of the unit.
These steps do not have to be in this order, but they are the way I went.
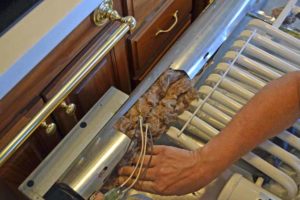
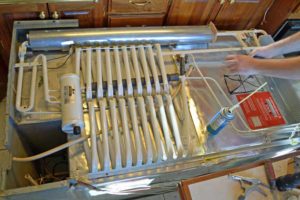
The refrigerator needs to be laid back down and I started with installing the electric heating elements
 There is a hatch that allows access to the tubes where the heating elements are inserted. The inside of the chimney is full of insulation. I did not want to disturb it any more than necessary
 I ended up unclipping about two feet of the chimney. It is only held together by some small metal tabs so it was not a big deal
When you put it back together make sure the end cap is up inside all the tabs on the bottom of the chimney. It took us several attempts to accomplish this
 As mentioned earlier, you have to feed the drain hose for the refrigerator through the back of the cooling unit as you lower it onto the refrigerator box. You want to be sure not to kink the hose. The hose gets fed down through the coils to the bottom of the refrigerator. I then used some foam to fill in around the hose and the hole in the back of the cooling unit

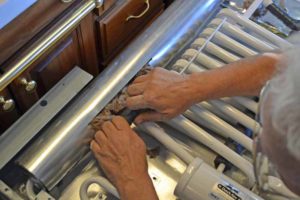
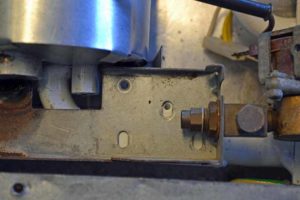
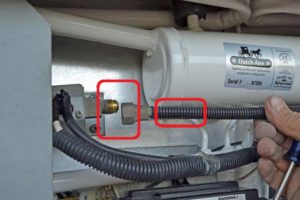
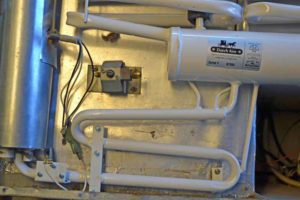 The propane shut off valve gets installed
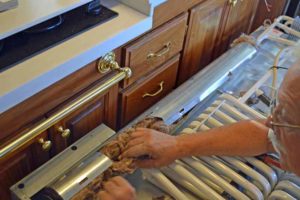
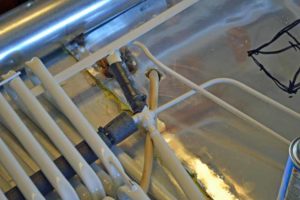
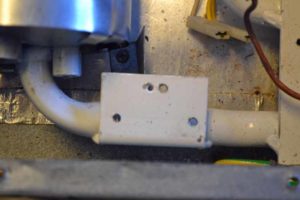
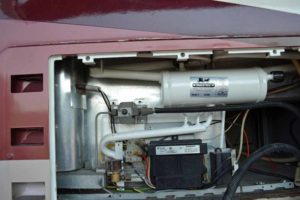
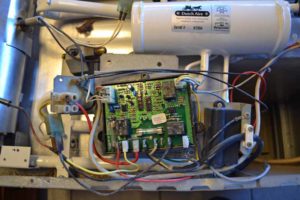 The control box gets installed. I took the time to reroute the wires behind the piping of the cooling unit. See pictures below
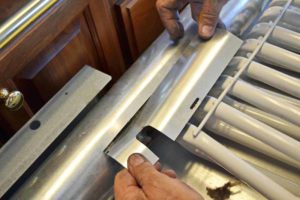
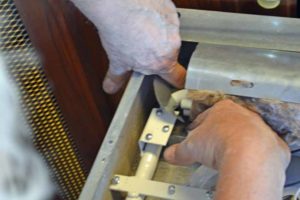
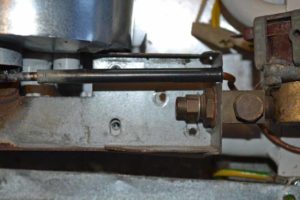
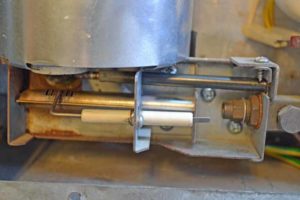
 The Burner unit goes back in. There are pre-drilled holes in the mounting plate and you want to use the screws provided so as not to puncture the coolant line behind the mounting plate
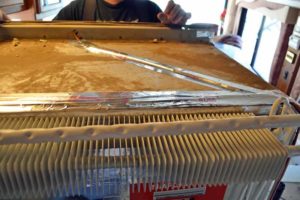
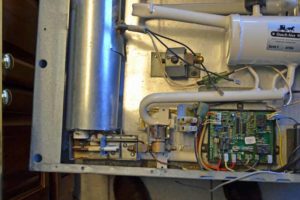 Now all the major pieces are back into place
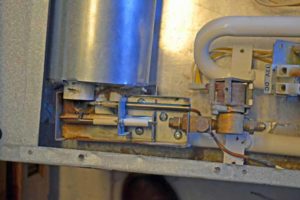
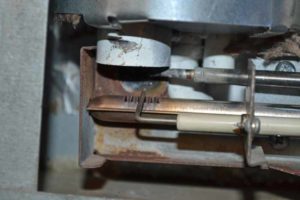 Made another mistake here, by over thinking the install. When I looked at the slots in the burner they were not centered under the flue in the chimney.
I called JC Refrigeration and left a message, to me it just looked wrong
 I removed the burner unit and saw a screw hole that was unused in the mounting plate
So I did a little bit of experimenting. I placed the burner so that it lined up with the three holes, and the burner was not centered, I moved it over so the unused hole showed up in one of the burner holes and now the burner is centered under the flue in the chimney (the burner has been removed in these pictures to make it easy to see the holes, look further down to see the alignment of the slots in the burn using the new hole).
Ok, so I think I am a smart guy; so I mark, drill and tape the plate so I can install the three mounting screws in the new location. MAKE NOTE I used a piece of steel in back of the mounting plate so as not to puncture the cooling tube that runs in back of the mounting plate.
Note now with the burner mounted in the new holes how the slots in the burner are centered directly below the flue tube in the burner.
But wait for it. I received a call back from JC Refrigeration. Turns out you DO NOT want the burner centered under the flue pipe. The explanation is when the gas flows down the burner tube an out of the slots the flame does not shoot directly up. It is slanted because of the gas pressure towards the outside edge. In addition the plate on the end of the burner wants to be directly in contact with the flue tube and it is not if you move the burner over as I did.
So…..due to my over-thinking of the project I have made another faux pas. I took it all back apart and moved it back to its original position.
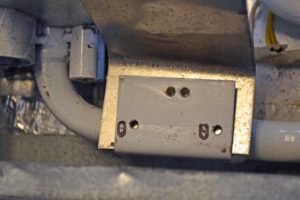
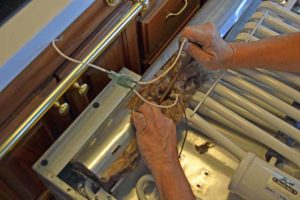
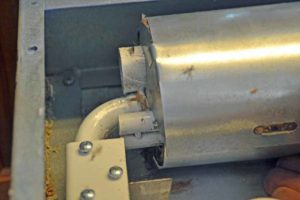
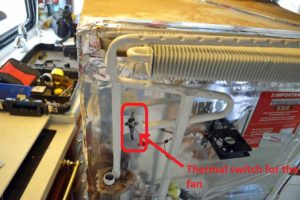
So awhile back I said I would explain the markings on the back of the cooling unit. When I purchased this unit I also purchased the fan kit. Under the coil on the back is a metal plate where the fan is mounted. What I did was use a magnet to find the edges of the plate and those are the marks seen. I then verified that with an awl. The fan comes with a thermal switch that gets mounted to a bracket which is welded on to one of the cooling tubes. This means the fan will only run when the tube is hot. I have a “hot Climate switch” on the front of the refrigerator which I will tap power off for the fan.
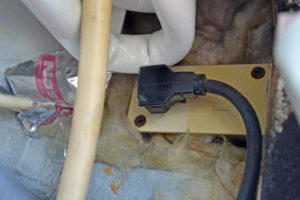
 This will allow me to shut power off to the fan if so desired and when the refrigerator is turned off there will be no power through the wires for the fan (even though the fan will not run unless the thermal switch sees heat). There is a better picture of the thermal switch below.
I used foil tape to control the wires running up and down the sides and across the back ot the refrigerator box. I did not want them caught on anything when sliding the refrigerator back into the cabinet. In the first picture, you can see the thermal switch for the fan.
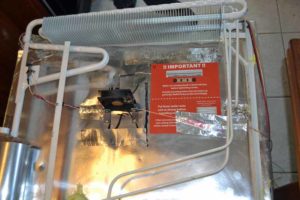
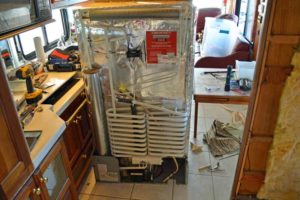 Unit is ready to go back into the cabinet!
Note the mess all-round the refrigerator, I have a good day of cleanup after this thing is in place.
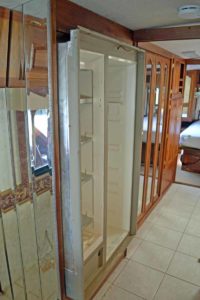 Back in and ready for the doors and hinges to be put back on. I have not mentioned that I snapped several of the machine screws off and they had to be drilled and the holes re-tapped to allow me to put all the screws back in their places. That also means I had to run to the local hardware store to pick up replacements. I only replaced screws with stainless screws.
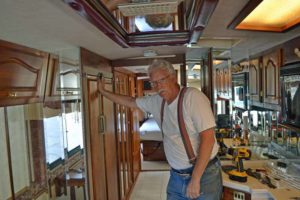
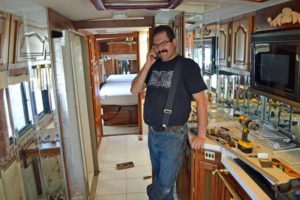 Here is my go to helper on his cell. He really stuck with it all three days. They were his days off from work and he does not get many of them, so I owe him for helping out here.
Well, I cannot get the propane line reattached to the shut off valve. The absorber on the new cooling unit is lower than the one on the old unit and will not allow the line to be put back on the shut off valve. I removed the valve and moved it lower. Although I do not show it, I used self-driller stainless screws to reattach the shutoff valve.
 Another small fitment problem. I could not plug the 110 plug back into the outlet. The plug had “wings” on it to make it easy to grasp and pull out of the outlet. I clipped the top wing off and was able to get it into the outlet
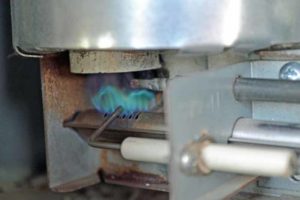 Flame on; let’s see if this sucker works. If I look at the flame, I’m not sure if the burner should not be moved back over to be centered under the flue. I have sent a picture to J C Refrigeration posing that question. It can be done with the unit still in the cabinet.
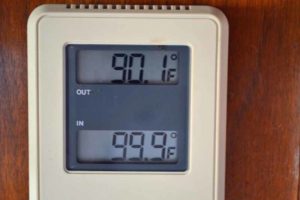
This is a good day for a test. Outside temperature was 90.1 and inside temperature was 99.9. I did run the generator and the A/C units while working on this project, but after I fired up the refrigerator I shut them down and went to eat. These were the temperatures when I returned two hours later.
As a note I consulted with J C Refrigeration on how long it should take to get the inside of the refrigerator down to operating temperature, he said 12 hours for an absorption unit (I’m not sure if he was referring to cooling the refrigerator and its contents or not).
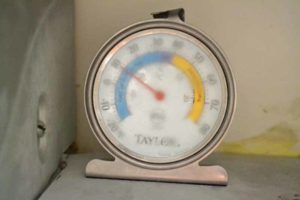
When I checked two hours after turning the unit on the freezer was at 10 degrees and the refrigerator was at 45 degrees. I believe the unit is doing its job.
I’m sure that if I allowed the unit to run 12 hours it would reach the desired temperatures. We generally fire up the refrigerator 24 hours before we leave on a trip.

Phew, is it really over?
I believe so, after several missteps on my part, three 90 degree days, running for hardware, not knowing what I was doing, I do believe it is over.
The four hundred dollar price tag to have J C Refrigeration remove and install the new unit certainly looks like a good deal now.