
LED Fluorescent Light Replacement 2017 09 27
Click picture for larger image
I had not intended to take on this project at this time, but one of the ballasts for the florescent lights in the trailer failed.
I did not want to put any money into replacing the ballast so that pushed the project of replacing the florescent tubes with LED replacements up the list.
Turns out there a bunch of different ways to go about this: LEDs that use the ballast, LEDs that bypass the ballast and single ended LED replacements.
I had access to some LED florescent replacements that bypass the ballast and use both ends for wiring.
Of some note is the florescent tubes already in the trailer were T12. The LED replacement tubes I had were T8. The socket for the T12 and T8 are the same and as I am bypassing the ballast. This did not make any difference at all.
So if you are thinking about doing this you need to do the research to be sure you are buying the correct LED replacement tubes for your project.
This is a very simple project and there will be more pictures than text in this write-up. There are five fixtures and ten tubes in the trailer, I will only be showing the change out of one of the fixtures in the trailer here. The last shots will show the inside with all the fixtures upgrades.
Let’s work on the left front fixture, unless someone would like to start on a different one. In that case, let me know and I will back up and do that one. Well, not really.
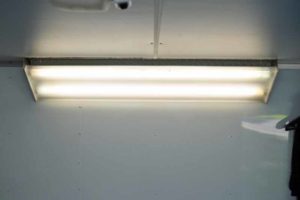
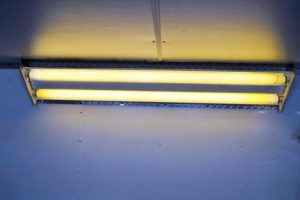
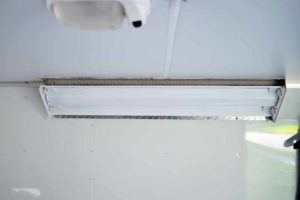
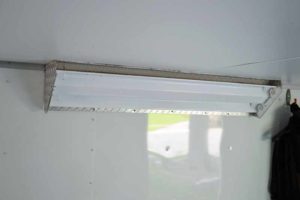
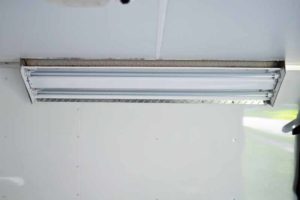
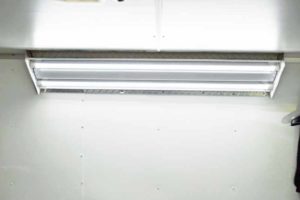
Taking pictures of lights is challenging as the camera wants to correct the brightness of the pictures so bear with me. In these two pictures, you will see the challenge. They are essentially the same shot, just one without the lens on the fixture, and one with the lens on. This is how the florescent light looks, first picture has the lens on and the second picture is just the tubes.
 Next the tubes come out to gain access to the cover over the ballast and wiring.
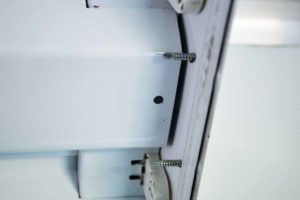
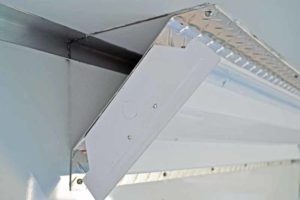
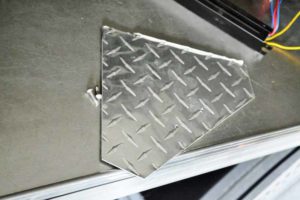
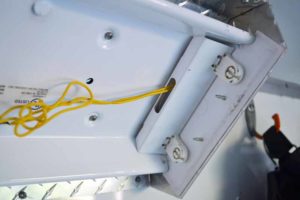
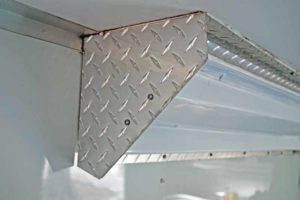
These fancy fixtures in this trailer present some unique changes. The screws that hold the aluminum diamond plate end pieces to the fixture protrude into the fixture and block the removal of the cover plate. The screws and end plate on one side need to come off.
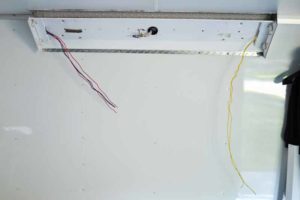
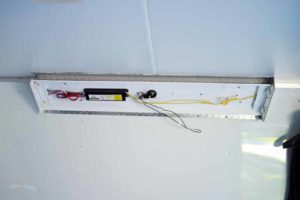 So now we have the internals exposed. The wiring of these fixtures can be found in many configurations. In this case, one end is shunted and the other is individually connected. The LED lights I have will be wired so that both terminals on one end of the bulb see one side of 120 volts and both terminals at the other end of the bulb see the other side of 120 volts.
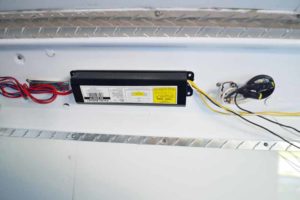
The LED lights I am installing do not require the ballast so it must be removed.
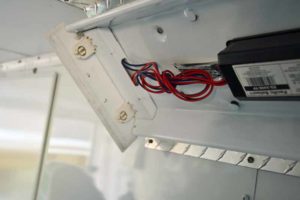
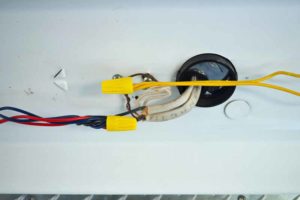
 The wiring for the LEDs is easy. As stated above both terminals of one end of the bulb are connected to one side of the 120 and both terminals of the other end of the bulb are connected to the other side of 120 volts. Nothing complicated here. As there is a lot of vibration in the trailer a little tape is added for safety

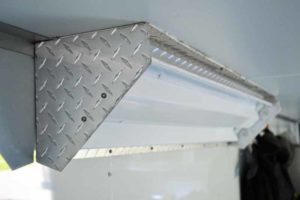
 The fixture is reassembled, that means the cover plate is put back on, the end plate is put back on
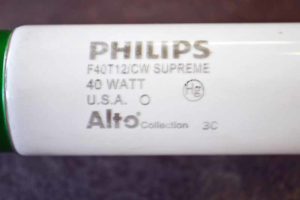 So these are the bulbs that we are taking out
 And these are the bulbs we are putting in. We are going from 40 watts to 28 watts of power usage. The big difference will be in the amount of light the LED bulbs put out for the amount of power they use. I could actually put an inverter in and use the battery to power the new LED lights. Something to consider for a future project
So let’s stick some bulbs in and light them up
 Here is a little side by side comparison. The light in the foreground is LED and the light at the back of the trailer is florescent. They both are supposed to be “Cool White”. Note the codes in the pictures of the different tubes. The code on those tubes are CW. There is a huge difference in the appearance of the light they are producing.
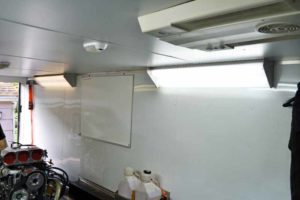
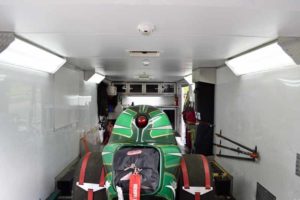 Here is a shot with all the fixtures fitted with LEDs during the day. It is like an operating room with the new lights
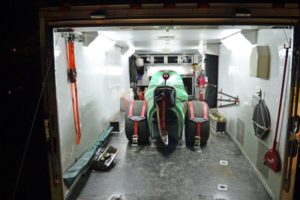 This is after dark, not that makes much difference to the lights, but they certainly look brighter when it is dark outside. I am going to have to start wearing sun glasses.
I would have to call this a successful project and also worth the effort