
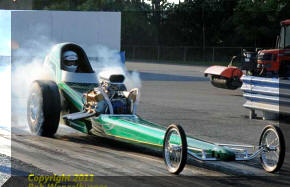
2010 Front Engine Dragster
Click Picture or Text for more pictures / details
Well, here we go again. I started getting interested in racing last year (2008). I bought a nice 1978 Firebird and ran it for the last half of the season. Over the winter tore it apart in the interest of speed (went from 14.2 to 10.6 in he 1/4 mile). To see that build click HERE.
Blew up two engines in the process
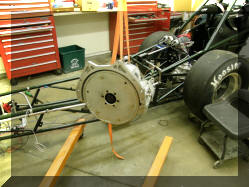
Found that that was not fast enough and got hooked on Nostalgia racing and have decided to build a Front Engine Dragster.
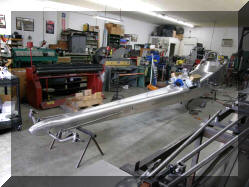
This build will be different then past builds as I will relay on builders to do a lot of the work. Quite frankly at the speeds that I will be traveling I do not trust myself to weld together my own frame. I thought about buying a kit and bringing it here and having it assembled. I decided to purchase the frame and have it build by the person selling the frame.
I sold the El Camino (it went to the Netherlands) to fund the project. I was really surprised that the cost of the project does not look as bad as I thought it might. On the other hand I have already started to add “extras” to the project so who knows how much it will end up costing.
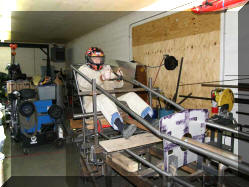
You can buy complete dragsters of E-Bay for well under $20,000, but my problem is I am 6′ 4″ and weigh 250 pounds (on a good day, I will be going to the gym over the winter to see if I can do something about this). My shoulders measure 25″ across.
I have been told by many people that it is VERY important to feel conformable sitting in the dragster and I was unable to find any completed dragsters that I would be able to sit in. Building one from scratch is far more expensive that buying one already put together.
Click here for a selection of U-Tube Videos on the dragster and other projects
 |
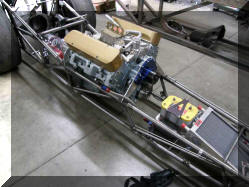
I have started a blower engine build for the dragster. Click here for that build |
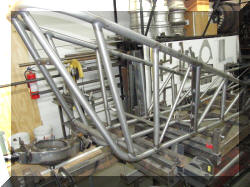 |
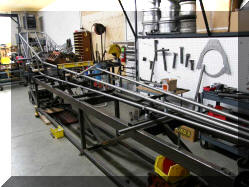
The process starts. I did a lot of research on the web, talked to a number of people who are in the sport and narrowed the search to three shops, and visited two of them. To see the visits click HERE |
 |
We are getting the Firebird ready for sale to create room for the FED To see that process click HERE |
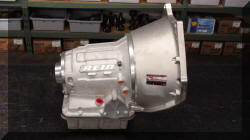 |
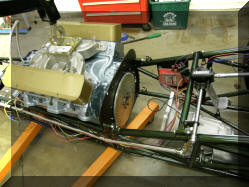
Here is the PowerGlide Transmission that has been built by Rutland Transmission Service, 4415 Spring Stuebner Rd., Spring, TX 77389, (281) 350-1365 lrmotorsports@aol.com for the Front engine dragster. To see that process click HERE |
 |
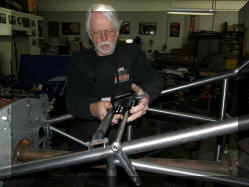
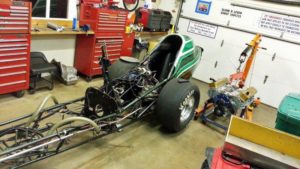
More progress to report. I took a trip out to Roo Man’s shop for my first fitting in MY chassis. To see that and more dragster history,click here |
 |
More progress to report. I took a trip out to Roo Man’s shop for my second fitting in MY chassis.To see that and more dragster history, click here |
 |
More progress to report. I took a trip out to Roo Man’s shop for my third fitting in MY chassis. To see that and more dragster history, click here |
 |
More progress to report. I took a trip out to Roo Man’s shop for my fourth fitting in MY chassis.To see that and more dragster history,click here |
 |
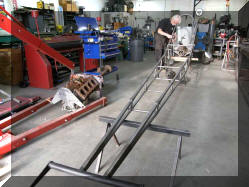
More progress to report. I took a trip out to Roo Man’s shop for Look see. To see progress on the Front Engine Dragster, click here |
 |
More progress to report. I took a trip out to Roo Man’s shop for Look see.To see that, click here |
 |
More progress to report. I took a trip out to Roo Man’s shop for Look see. To see that, click here |
 |
More progress to report. I took a trip out to Roo Man’s shop for Look see. To see that, click here |
 |
More progress to report. I took a trip out to Roo Man’s shop for Look see. To see that, click here |
 |
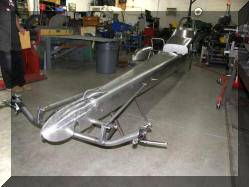
Paint!More progress to report. I took a trip out to Roo Man’s shop for Look see. To see that, click here |
 |
It has been awhile since I produced an update. I’m going to jump ahead to 12/27/2010 and start there. To see that, click here |
 |
Worked on the starter and Mid plate today To see that, click here |
 |
I went to bolt up the torque converter to the flex plate. It did not go as smoothly as hoped. To see that, click here |
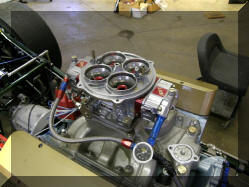 |
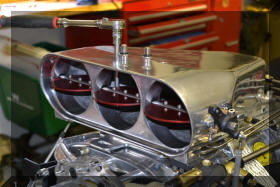
Carburetor, starter, fuel lines To see that, click here |
 |
Fuel system is complete, coolant is almost done, electric is not too far away To see that, click here |
 |
Starter Cables To see that, click here |
 |
More wiring and so neat work on the air scoop. To see that, click here |
 |
Headers and rear end work To see that, click here |
 |
Fluid now in two more systems with only one to go. To see that, click here |
 |
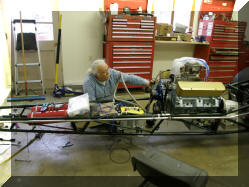
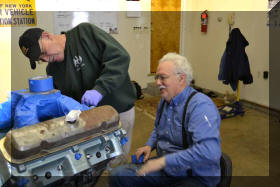
Had another unofficial car nuts meeting today. To see that, click here |
 |
It has been awhile since I produced an update. I’m skipping around but will go back and fill in the gaps so keep checking the site for past and future updates. To see that, click here |
 |
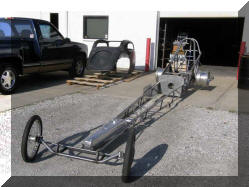
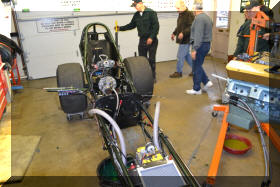
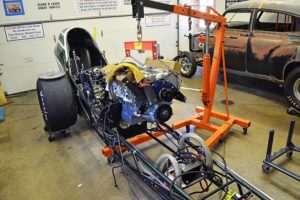
All together in one piece again. To see that, click here |
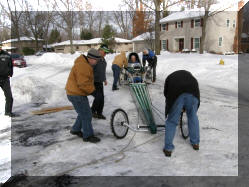 |
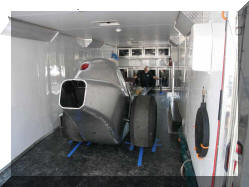
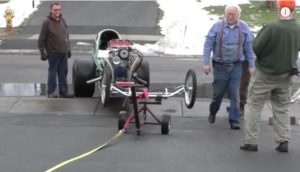
The big move from the garage to the trailer for the trip to Indiana To see that, click here |
 |
Progress 2011 08 14 Click here |
 |
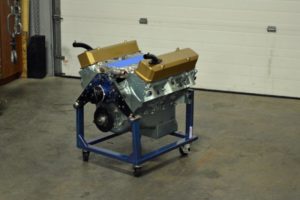
Time to go faster To see that, click here |
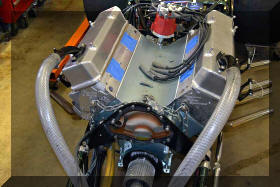
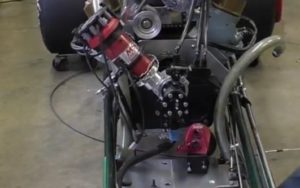
| The engine has been on the Dyno! http://www.youtube.com/watch?v=1m2jRDBoIcw&feature=youtu.be 652 HP |
|
 |
Click here to see Misc tasks to put the engine back into the dragster, Paint the engine, New coolant system to use all the ports in the heads instrad of just the front one. |
 |
Well racing season is over and it is time to start thinking about next season 2013. I want to go FASTER so we are installing a blower, click here |
 |
This is the second week on installing the blower, and we have gotten closer to the belt system being useable, Click here to see the details |
 |
See the final fitment of the blower drive and the very start of the remote fuel pump mount here. |
 |
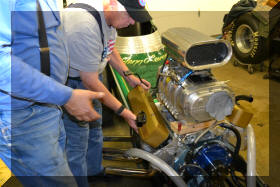
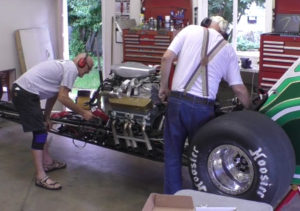
The Car Nuts got together toady and worked on the Fuel system, wiring and throttle cables, to see that click here |
 |
This update is for two weeks, it includes burn down tubes, old fuel line, seat belts, water outlet, blower restraint bag and plate straps gasket fitting and modifications to the intake and valley pan. Click here. |
 |
Well it is all apart AGAIN, we did make some progress, made a bracket for the fill tank, got the blower bag put back on (modified), Click here |
 |
New update with a number of small tasks completed, Coolant fill tank, Intake bolted on, Front gasket between the timing chain cover and engine plate replaced. To see that click here |
 |
Lots going on here, blower studs installed, pulleys purchased, Belt guard problems, Coil mounted, TDC found and marked, The biggie is the fuel system is back from FIE. Coolant system, Click here |
|
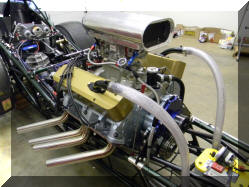
Here is the newest BLOWN Pontiac powered dragster as of yesterday. I now have to pull it all apart again as the right head is dripping water (solid copper head gaskets will do that |
http://www.youtube.com/watch?v=r6zRsObuerw&feature=youtu.be |
 |
Ok, it came apart again, had a coolant leak on the right head, made an improvement to the coolant system. To see that click here. |
 |
Self primer installed |
 |
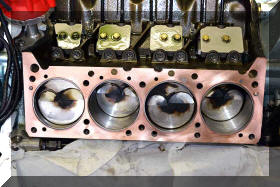
Time to take a look at the engine after 200 runs, click here |
 |
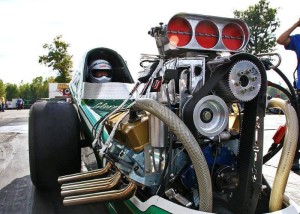
Some action shots at the Drags To see that, click here |
 |
It’s Father’s Day 2015 in a week and now I am ready to build a new ride and have this wonderful ride and rig for sale: Dragster ad |
 It’s Been a Whirlwind Here!
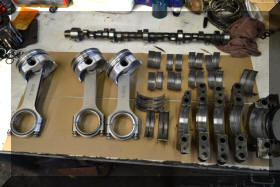
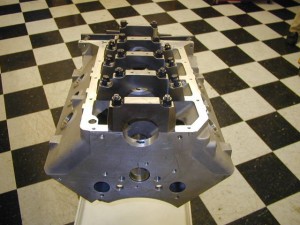
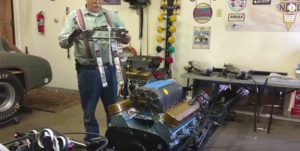
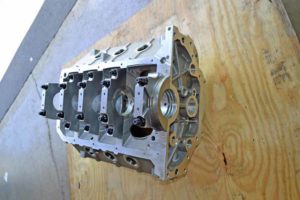 New Aluminum PONTIAC Block for the dragster has arrived
 Engine Cradle for the cast block engine
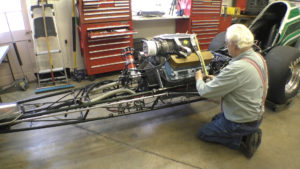
 Preparation for the 2017 Season day 1
 Preparation for the 2017 Season day 2
 This link will take you to the YouTube video on Move of the Dragster from the trailer up the driveway and into the garage
 This link will take you to the YouTube video on Step Three in Engine swap in the Dragster
![]() This link will take you to the YouTube video on the Engine and Transmission being pulled out of the Dragster
This link will take you to the YouTube video on the Engine and Transmission being pulled out of the Dragster
This link will take you to the YouTube video on the Reassembly of the engine pulled and for sale

This link will take you to the YouTube video on the Test fit the Engine in the Dragster and paint it
 This link will take you to the YouTube video on the Fitment of the Engine to the Midplate
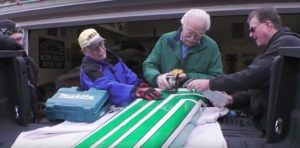
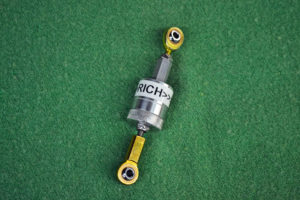
Today’s project is to fit and measure the straps for the blower restraint on the new engine. This evolved putting the blower on the new engine, removing the blower restraint from the old engine and putting it on the new engine so I could get an accurate measurement of the length of the straps to order the new blower restraint.
Another update. In the last video we found two problems with the Blower restraint and the the two rear injectors and the main fuel feed line. We address both problems in this video.
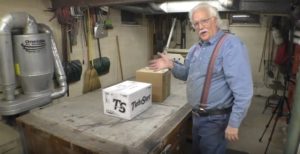
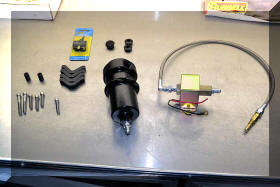
This video is an unboxing of the TurboStart S16V battery (16 volts) and CHG25A charger (for 16 volt batteries) for the Front Engine Dragster.
The new engine in Front Engine Dragster has a mag in it. The engine has to turn over quicker when starting to energize the mag so the engine will start.
![]() In this video a mounting plate of 1/4 inch aluminum is cut and fitted to the bottom of the Front Engine Dragster. I need to mount to it the TurbStart 16 volt Battery, MSD Points Box 8106 for the MSD Pro Mag 20, and the System 1 remote oil filter.
In this video a mounting plate of 1/4 inch aluminum is cut and fitted to the bottom of the Front Engine Dragster. I need to mount to it the TurbStart 16 volt Battery, MSD Points Box 8106 for the MSD Pro Mag 20, and the System 1 remote oil filter.
The plate was completed but I ran out of time to show the actual mounting of the components and checking the height of the body.
 This video is different from videos I have uploaded in the past.
I have been dreading cutting the body to fit around the fuel pump but today is the day. How the pump is orientated is dictated by the body and that dictates how the components will be mounted on the floor plates made in the last video.
 In this video we build a bracket for the Remote Oil Filter. Placement and the angle of the bracket were a challenge.
At the end I was pretty discussed with the final result, but it works and I have no time to build another on. The first race in May is fast approaching and there is still LOTS to do.
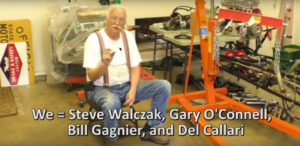
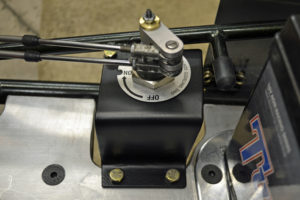 This project started back on February 24 in the Car Nuts Meeting. At that time, a conversation was held between Ken Long, Jim Boehly, and me. In that conversation, the new Control Cable Arm for the top of the Master Power Switch was discussed.
This video covers the creation of the bracket to hold the new switch, and positions it slightly forward of the original switch.
![]() In this video, we do the final location and installation steps for five components: Points Box for the Mag, Three Step box, RPM Trigger box, Tachometer Signal Generator and battery
In this video, we do the final location and installation steps for five components: Points Box for the Mag, Three Step box, RPM Trigger box, Tachometer Signal Generator and battery
In addition, we route the oil lines for the remote System 1 oil filter and connect the filter. I will generate a separate video on how to connect the hoses to AN fittings
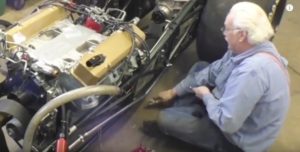
![]() Hopefully, this video shows the final Engine install into the Front Engine Dragster. I believe this maybe the final time I put the engine into the Front Engine Dragster.
Hopefully, this video shows the final Engine install into the Front Engine Dragster. I believe this maybe the final time I put the engine into the Front Engine Dragster.
To do that, the remote oil filter adapter must be bolted to the engine. And to do that, -AN fittings need to be installed on the ends of new -10 hose.
![]()
Put the Blower onto the Front Engine Dragster / Discussion on A/F mixture at idle with Click-Fast adjustment device (second half of the video).
I give a small discussion on Air Fuel mixture and it’s importance.
I describe a product called Click-Fast (I have no affiliation other than I am using the item) and it’s impact on setting up the engine to idle smoothly.
Watch the video
 This video introduces a tuning tool that was introduced to me. I found it very helpful and thought I would pass the information on.
This is the contact information for the person that sells the device:
Mr. Ray Hadford
rayhadford@frontier.com
Pacific Standard Time (425) 238-3235
![]() We have a two part video project this time!
We have a two part video project this time!
Part 1 This video contains the modifications needed to make the flex plate work to install the transmission into the Front Engine Dragster.
Part 2 the front seal in the transmission removed and replaced, the torque converter is installed in the transmission, and finally the transmission is installed into the front engine dragster
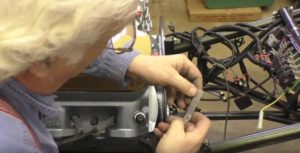
 In this video we will remove an old valve spring from a head, determine valve spring install height, install the needed shims, and install the new valve spring while the head is still bolted to the engine.
We will then test out calculations by measuring seat pressure with the valve spring installed.
![]() In this video we modify the coupler between the transmission and rear end to accept two additional locking collars.
In this video we modify the coupler between the transmission and rear end to accept two additional locking collars.
There is no universal joint in the drive train of a Front Engine Dragster. A coupler takes it’s place.
There was an incident in our racing series last year when one came loose and did some damage. I would like to try and avoid that kind of excitement, so we are doubling up on the locking collars.
![]() No, wiring, say it isn’t so
No, wiring, say it isn’t so
Wiring, Here we go, This is the “Brains”?
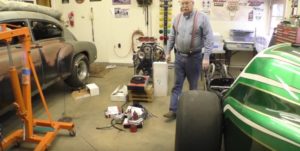
I did not complete a project this week.
Thought I would just put up a progress report.
Drew up a circuit diagram for the Points box, 3-step, RPM Signal Generator, and RPM Switch.
Actually turned some screws, or in this case crimped some wires.Learned that I need a magnifying glass in order to read the numbers on the back of Deutsch Connectors.
It would be nice to be able to report at the end of next week that the wiring is done.
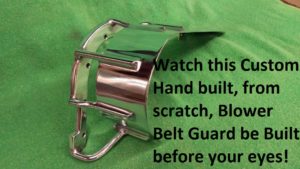 This video shows the build of a blower belt guard from scratch. The steps required, the skills, the effort and the finished product.
I asked my son, who is a very talented fabricator, to create the belt guard. What my son made is well beyond my capability.
 In this video we talk about the move and the current status of the dragster
 In this video, we install a converter to step down the voltage out of the 16 volt Turbo Start battery to 12 volts, start the beast after an engine rebuild, and find yet another mystery.