
Lamp 002 2016 12 21
Click picture to see larger image
I’m going to try my hand at this again.
This will be a Christmas Gift for my son George. I was thinking this would be easier that the first one as the center piece (the carburetor for the 1949 Chevrolet Gasser) was already made. All I had to do was clean it up. The center piece on the first lamp for Arthur was the V8 symbol for Ford and I had to make that.
I actually used a lot more engine parts on this one along with some driveshaft parts
 Once again I got my inspiration for an example that I found out on the internet. I wish I had more artistic capabilities, but Arthur got all of that. I have the ability to see something and reproduce it and maybe make it a little better (or at least a little different)
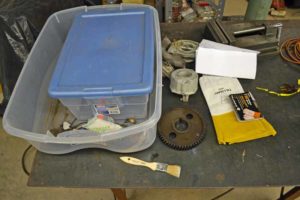
The first step was to gather some parts and clean them up a little to see what I had to work with. I have been getting donations from friends of old parts and now have half a bin of what Matt Shaff calls short steel scrap engine parts. The air cleaners came from Bob Way who used to have a beautiful tri-power Corvette. He was going to install them on that vehicle, but sold it.
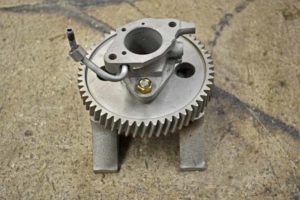
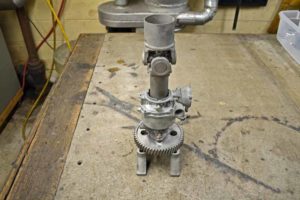
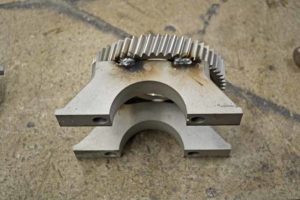 I’m not going to try to TIG weld these parts together as Christmas is fast approaching and I am much more confident with the MIG. Even with that, I am not very good, but getting better. These main caps are out of a Semi Tractor and the gear is the drive gear for an oil pump on that same vehicle. These parts were donated by Don Yanchunis
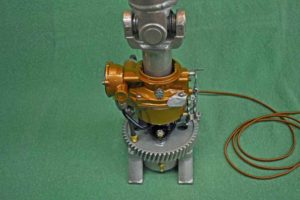
The carburetor came from the 1949 Chevrolet Fleetmaster Deluxe that was purchased for a project car when Arthur went to the Hot Rod Institute out in South Dakota. It was a running driving car at that time but has not been driven for a long time now. You can see that project here on the web site under family vehicles. The base to the carburetor is actually cast iron. Interesting how things have changed. I was going to drill holes and bolt the base to the gear. Turned out that the gear was hardened and there was no way I was going to be able to drill it, so I welded bolts to the gear to act as studs.
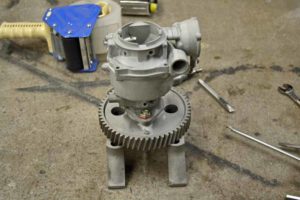
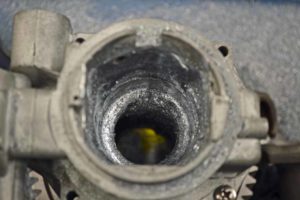
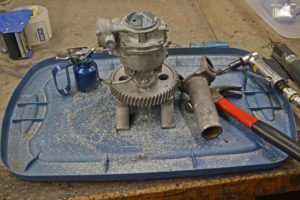 What to do for an upright to support the lights? My wife likes tall lamps. I used rods for the last lamp, so I came up with the idea of using parts from a drive shaft. They actually did not go together so some modifications were required to make that work as well. In order to do that the carburetor had to be gutted, and the single barrel had to be increased in size. Chips flew everywhere, but we got there.
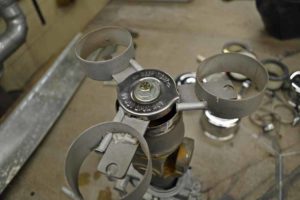
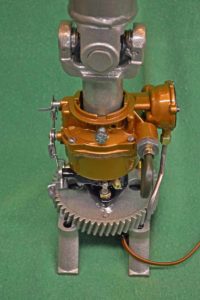
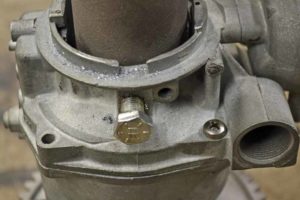 The fit was not as tight as I would have liked it and it did not sit square in the carburetor, almost like it was never meant to go together in this way! I drilled and tapped the sides (front and back) of the carburetor and installed set bolts so that I could adjust and fasten in place the angle of the yoke of the driveshaft.
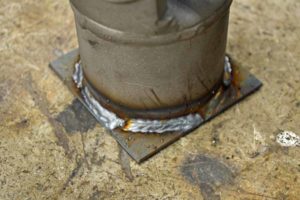 The welds above were not very nice looking but these came out really nice. I wish I could weld like this all the time. It is unfortunate that these welds are on the underside of what will be the top of the lamp.
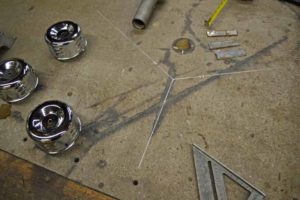
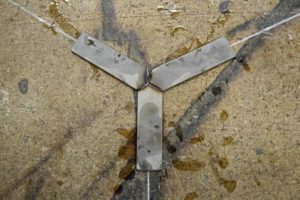
Hey kids, when you are sitting in math class and wondering how you will ever use the knowledge the teacher is trying to pass on to you, here is an example how you will later in life need that information. Instead of using a single air cleaner like what was used in the last lamp. I want to use three air cleaners donated by Bob Way. So how do I get them equal distant apart. Well they have to be 120 degrees apart. A little graffiti on the top of the workbench will help me get there. Ok here is a question, what are the angles that need to be cut in the ends of the struts that will support the light bulbs?
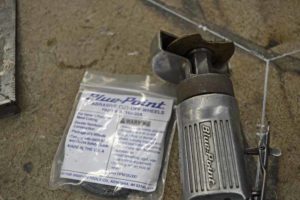 Even good tools and shop supplies does not mean that there are not dangers in the shop. You need to be on your toes all that time and keep your mind on the task at hand. Bad things can happen!
So, after a moment the construction of the top of the lamp continues. After laying out the spacing of the air cleaners the struts were cut to length and holes were drilled for the bases of the light sockets.
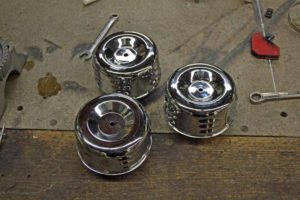
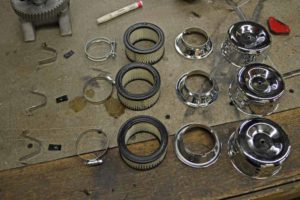 I drilled out the spot welds on the braces that held the air cleaner covers over the air cleaner elements. I wanted to raise the covers up so the elements would allow light to pass through. I was able to reuse the brackets to hold the covers above the elements. There are getting to be a lot of parts to this lamp that I thought would be a simple build.
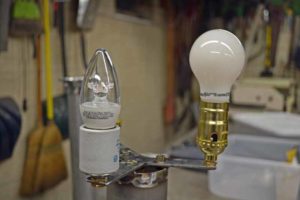 Even the best laid plans go afoul. I though the LED bulbs that I bought would be short enough to fit inside the stacked air cleaner element and air cleaner cover (the LED bulbs are shorter that the standard filament bulb, and also cooler for the confined space). My wife and I went back to Home Depot and she found these LED bulbs that were even shorter and I found these ceramic sockets. The combination of the two worked out perfect.
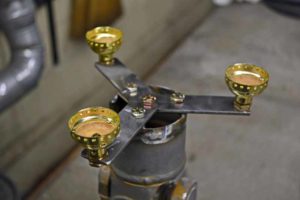
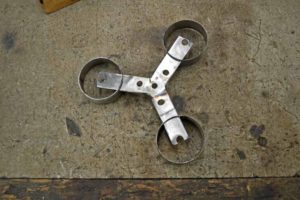 After some grinding, some scrap exhaust pipe turned out to have the correct outside dimension to fit the inside dimension of the base of the air cleaner. I got a little fancy and cut slots in the sides of the pieces so that the struts slide into the sides of the exhaust pipe pieces. It kind of looks like a tri-copter here.
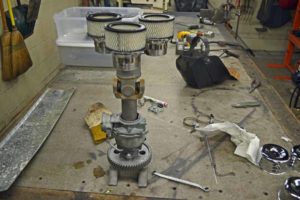 Let’s mock it all up and see what we have. If you squint, it kind of looks like a street light.
 I’m back to ugly welds. This top piece got complicated. I slotted the struts into the sides of the mounts for the air cleaners. I used brake lines to hide the lamp cord between the base and the upright. To top it all off, I used a radiator cap to cover the hole in the center of the upright.
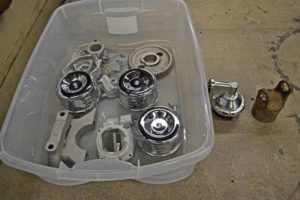
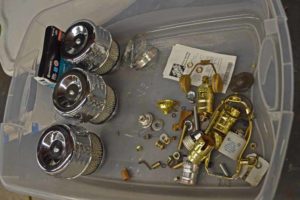 Apart it all comes again for final clean up and the magic of powder coat. That is quite a bin of parts I hope I can remember where all the pieces go.
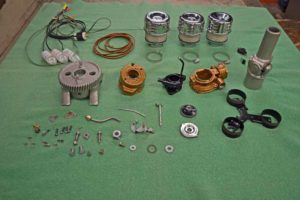 Final clean up and powder coat all done. Started the powder coating at 11:30 at night. While waiting for cure and cool cycles, watched the first Tremors movie and the first part of Tremors II: Aftershocks and, at 4:00 in the morning, was done with three different colors and clear coats. Now I have a stack of parts to put together
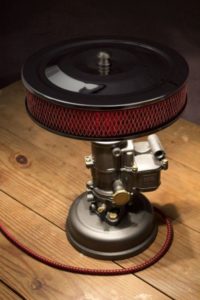
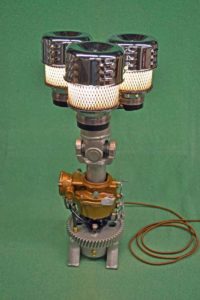 I think it is a little tall, but very stable. I could cut out some of the driveshaft, but we will see what son number one says. There are 3 60 watt equivalent light bulbs in the lamp. It does not throw as much light as the first lamp made for Arthur. The first lamp did not encase the bulb (the underside was open). I think this one looks better though. You will not be able to read by it but will give great ambient light for watching TV. I used the cloth covered lamp cord again and it looks great with the lamp. I also added a number of lines and linkages, also the original carburetor tag
 I think the details I added to the carburetor add a nice touch to the lamp. Although the linkages do not function (the guts to the carburetor were removed) they look good.
There are three different pipes on the carburetor: the heat riser for the automatic choke, the vacuum line to pull the choke on and the fuel line, and the low speed adjustment jet on the back side
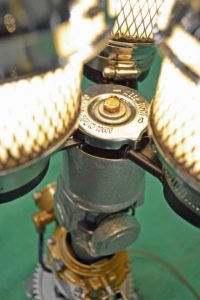 The radiator cap is the final detail that I think helps put this lamp over the top. On to another project. Actually I need to spend some time on the dragster.