Powder Coat Part 10: Tips and Techniques
Click image to see larger picture
We are here. This section is more about tips and tricks than requirements
First, you need to prepare your part for powder coating. The piece you want to powder coat will most likely have some grease and oil on it. You will want to start with cleaning that up as much as possible. Grease and oil will contaminate your blasting media. There is nothing worse than getting something clean in the blaster and then have the siphon hose pick up a lump of grease that fell off the piece earlier and spray it all over the piece. Keep your sand as clean as possible. You can scrape most tar and heavy grease off. “Gunk” and a power washer works wonders, but is not needed. Degreaser and a brush along with elbow grease will get your part clean and ready for blasting.
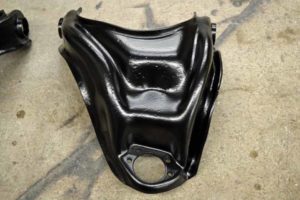
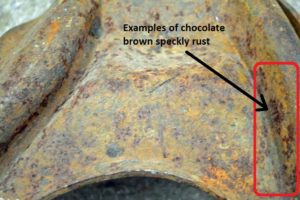 I would say that this piece is a fairly typical piece which you want to restore to service and powder coat. One thing to look for when looking for a good candidate to restore is the chocolate brown specks of rush. When this is sand blasted, it usually results in pits that will be visible when done. Powder coat does not hide imperfections. If anything, it will accentuate them.
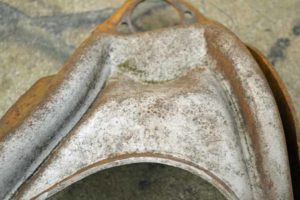 When sand blasting, how far do you need to go to have a good surface to powder coat? This is not far enough! As with most things, preparation is 90% of the work. Take your time and it will show up in the finished product.
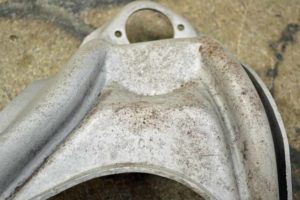 This is getting closer, but if you leave rust under the powder coat, it will start to bubble up again after the part has been coated. If you get it clean, it will stay rust free for a very long time.
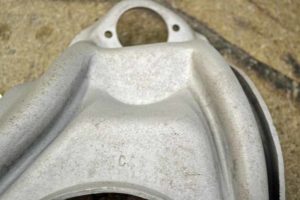 Now, we are talking. This is starting to be clean enough for applying the powder.
One mistake people make when sand blasting is that they wave the gun around. The blaster needs time to do the work. Stay in one area until it is clean and then move on.
This means that when you are blasting, you are cleaning a ¾ inch diameter area that moves relatively slowly across the surface. The size of this area depends on the equipment, but you get the idea. You want to avoid keeping the gun in one spot as it can eat the surface of the part away and create shallow indentations that will be visible in the finished product.
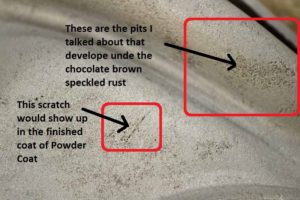 As we get closer, you can see there are still areas of concern. You want to deep clean the rust pits. You also want to be on the lookout for defects to clean up. You could stop here, but to produce a quality surface you need to go further.
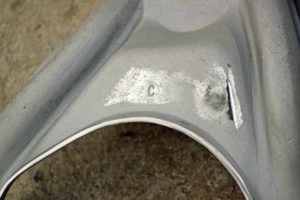 If you take the time here to clean up the edges and any areas that have factory stampings, they will become fine details in the finished product that will make the piece stand out. Note the detail around the stamped “C” in the control arm. This detail will show up through the Powder Coat. The scratch has been ground away. Grinding is a whole other art. Keep the grinder moving, NEVER sit in one spot, use a light touch and try to blend your edges together.
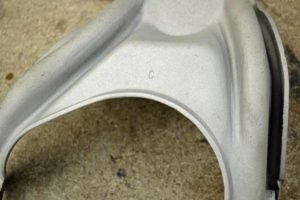 Into the blaster one more time to blast the ground surfaces to give the surface the same texture as the rest of the piece. If you did not do this, you would see the surface differences in the powder coat finish. Now this part is ready for applying the powder. Almost.
Before applying powder, let’s talk about what is needed to do the actual coating and curing. Not the oven and booth, but all of the little things that we tend to forget about.
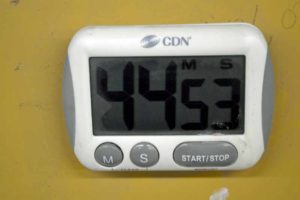 Once you get a feel for how long items take to get up to temperature, a great thing to have is a timer. Get one that is magnetic so that you can put it right on the oven door. I use 45 minutes as my cycle time.
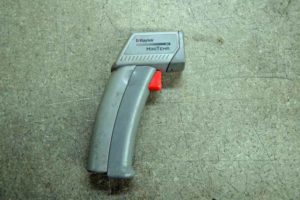 There is no better way to know the temperature of a part than with an infrared temperature gun. The temperature of the part drives everything in the powder coat process. Note a shiny surface will tend to give lower readings.
The first thing you want to do is get the piece as clean as possible. When I take the piece out of the sand blaster for the last time and I am happy with how clean it is, all I do is blow it off with an air gun. Depending on how clean your sand is and how clean the piece is, you may want to wash the piece in a cleaner. For this purpose, I buy cheap automotive paint thinner and I have a brush and I drain into a special pail. I have a local engine shop that takes my waste and burns it in their recycled oil heater.
Of special note here: Powder coating is an electrostatic process. Blowing air across the surface of an object is very much like rubbing a balloon on your head in that it “blows/scrubs” electrons off the object giving it a charge. With a balloon, you can then stick it to a wall. With powder coat, it will affect the way powder is attracted to the object. The way to remove the charge is to put it into the oven for 15 minutes. You’re going to do that anyway when you remove the gasses from the object . Just remember this when you are getting ready to apply your powder and you want to blow the object off one last time. You can do it, just be gentle with the air.
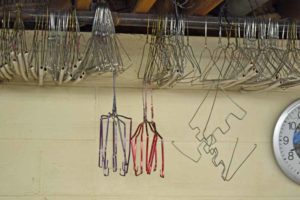 Hangers. Once again, many people are out there with their hands out ready to take your money. I make my own hooks from clothes hangers. I have a friend that owns a shop that supplies uniforms to his employees. He lets me have as many hangers as I want for free.
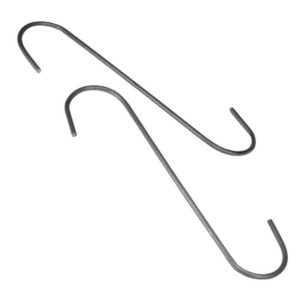 This company wants $7.99 for six hooks plus shipping.
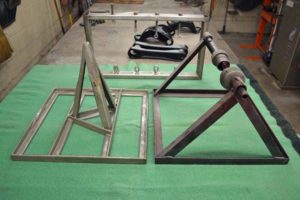
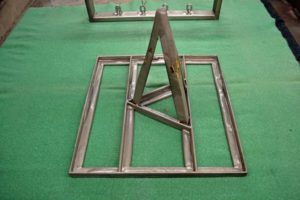
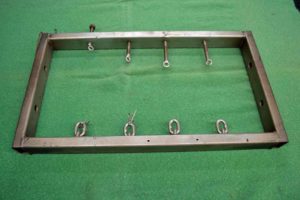
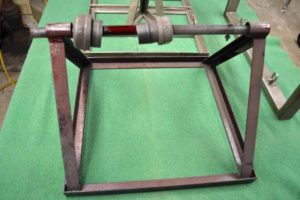
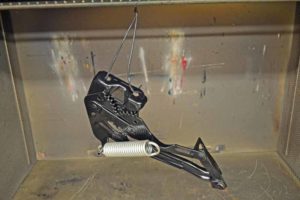
I have also found that building a jig helps when you do the same type of parts often. These are some examples of a jigs I have built.
> One for trailer rims. The rim sits on the three sided pedestal and the only thing touched on the rim is the three areas of contact in the center hole of the rim from the pedestal. You can handle the rim and move it to the oven by picking up the base of the jig. I usually do the back side of the rim and then flip it over by handling the inside portion of the rim (between the beads) and then do the front side and the inside of the rim. When I flip it over, I set it on the pedestal in a different orientation and that way the contact areas also get coated.
> Second for spreading springs apart enough to get the surfaces of the spring that are normally in contact when the spring is in its rest state. I created this jig for automobile hood hinge springs.
> Third for motorcycle rims where the wheel has a bearing race surface that must be protected.
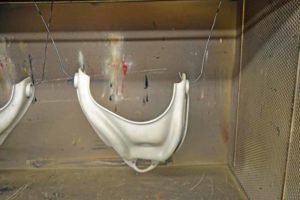
The best way not to end up with marks in the final finish is to hang the piece through a bolt hole or other hole in the piece. Sometimes you have to get inventive with how you bend your hook so that it does not touch the piece in any other spots.
1. I find it necessary to hang each piece from two spots on the piece so it does not move around in the oven when curing. I do have a convection oven that blows quite a bit of air through the oven.
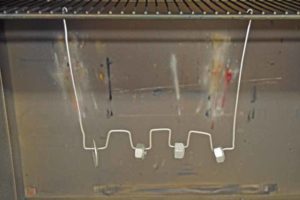
2. You can use the hooks over and over, but what happens is powder builds up on the hook and becomes an insulator. Even if you clip your ground directly to the piece to be powder coated, the hook will also try and act as a ground. As powder coat is an electrostatic process, you may find it affects the adhesion of powder around the spot where the hook touches to the piece to be powder coated. There are two solutions: one is to use new hooks each time, and two, to break away the powder from the spot that touches the piece to be powder coated. Needle-nose pliers with a serrated grip area works well for this. Note the valve cover hangers below
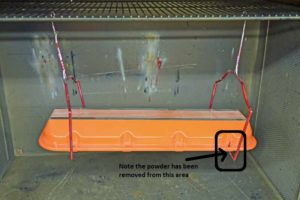 I use these hangers to do valve covers. Note the buildup of powder on the hanger, except where the hanger touches the valve cover. I have cleaned the powder coating from the hangers there. You can have one or two layers on your hangers but any more than that will affect your end result
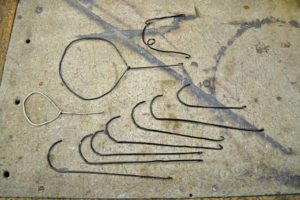 Just a normal hook will hold quite a bit of weight. However, you want to make sure the piece doesn’t fall on the floor of the oven. When I do intake manifolds or other heavy objects, I loop the hook all the way around and hook the end hook to the hanger itself.
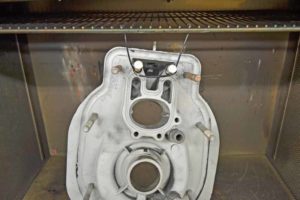 Here are some examples of other ways to hang things. It’s not rocket science. Just bend the hanger up so you can put the object into the oven and not have it touch anything. The hood hinge below is just hung for demonstration purposes. It was taken apart and two different colors were used and then reassembled. When you do nuts and bolts, put on as thin a coat as you can and still cover. Remember powder adds thickness.
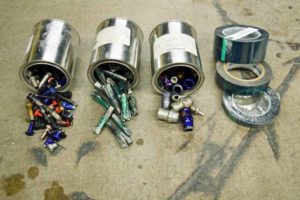 There are surfaces (machined areas, threads) you do not want to be powdered. I make my own plugs by rolling up tape and I use bolts and pipe fittings which I use over and over again.
In most cases, it is much easier to protect a surface from powder than to try and remove it after the fact.
Don’t use just any old masking tape. The tape must be able to withstand the temperatures of the oven.
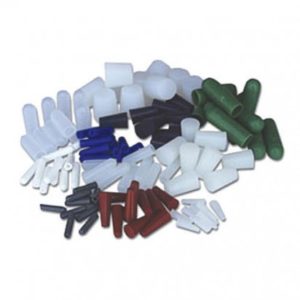 You can buy reusable silicone plugs. This company wants $49.99 plus shipping for this assortment
So now you have a clean part and it has been hung. The next step is to outgas the piece to be powder coated.
What is Outgassing? Outgassing occurs when trapped gasses are released from a part when heated. You want to avoid outgassing through the powder during the cure process. This causes bubbles or pin holes in the finished surface. What causes Outgassing? Outgassing can be attributed to
- The object being powder coated
- Surface contamination
- The powder itself
Surface contamination is something you can address as you clean the object to be powder coated by keeping it clean. Powders that outgas I just do not know enough about, but avoid cheaply made powders. Buy good powder. I use Prismatic Powders and have not had this problem with their powders.
So how do you prevent the object itself from outgassing? This is generally caused by gasses trapped when the object was made or cast. It can also be caused by oil trapped in the pores of the metal. The older the object is, the less likely it is to outgas from the manufacturing process.
I preheat the object to 50 degrees hotter than I will be curing at as a precaution. I bake the object at that temperature (all temperatures should be understood as the object temperature not the oven temperature – think Thanksgiving turkey) for 30 minutes. More outgassing time won’t hurt, but too little will.
After the outgas baking, I let the object fully cool back to room temperature. I remove the object from the oven to cool and close the oven back up to keep the heat in the oven. Depending on your oven, you may want to keep the oven on as you will get a better finish if you put your coated object into a heated oven.
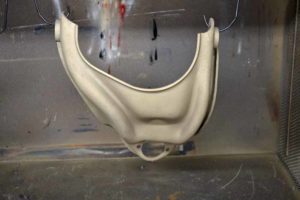
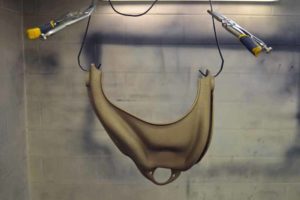
On the left, we are ready to cook to outgas any gasses that might be trapped in this control arm. On the right, after it has been cooked. You can see the difference in color.
Remember that I said that you should remove this hot item from the oven, close the oven up to keep the heat in. How to best do that.
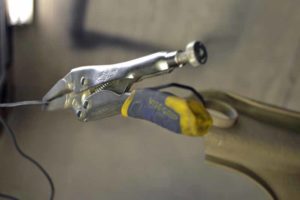
I have found that using needle nose Vise-Grips works really well. They keep your hands well away from the hot object,eliminate the need for gloves, and provide an nice “handle” to hold on to. These are nice since you can leave them attached and they stay in place.
I also use them to move the coated objects to the oven because they keep you from bumping the object and having to recoat because you brushed the powder off.
Now it’s time to get your gun set for spraying the powder. The adjustments may be different for different powders. For example, if spraying semi-gloss black, the powder tends to stick to itself and needs a little more pressure to “liquefy” the powder in the hopper. This will be true for both remote and attached hoppers.
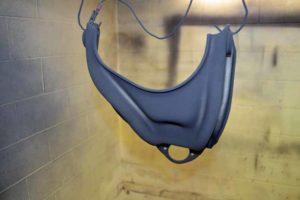
You will find that small adjustments in the voltage may be needed for different powders to get them to stick to the object. As an example, I have two different top coats – Lollipop Red and Lollipop Blue. The Lollipop Red top coat can be seen on the air scoop at the very beginning of this subject. The Lollipop Red is a dream to spray and sticks to just about everything, but the Lollipop Blue is a nightmare and I have to pull all the tricks in my book to get an even coat. Same brand, just different colors of powder.
My first coat is generally sprayed at about 40 KV with the air pressure set around 18 to 20 PSI.
The final adjustment that has to be taken into account is the amount of powder in the hopper. You never want to fill it to the top. If you do, you will get a huge amount of powder out of the tip of the gun and the gun won’t have a chance to charge the powder. I usually start with the hopper a little more than ¾ full and, once it gets down to below ½, I need to stop and refill the hopper to keep a consistent flow of powder out of the gun.
The best description I can give of the right amount of powder is: Imagine an experienced smoker who takes a very deep draw on a well light cigarette and then exhales. That is the density of powder you want coming out of the tip of your gun. Powder adjustment is a combination of the amount of powder in the hopper and the air pressure used.
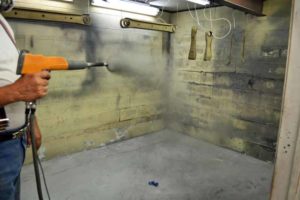
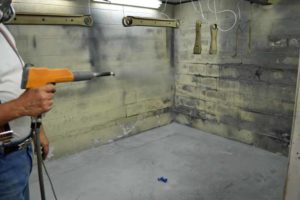 This is an example of not enough powder coming out of the nozzle
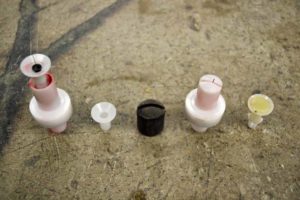 Most guns will provide you with an assortment of nozzles. Different nozzles give you different spray patterns in order to get the powder to cover a desired area. I have found that by moving the tip in the nozzle, you can accomplish the same thing without having to change tips or even having them.
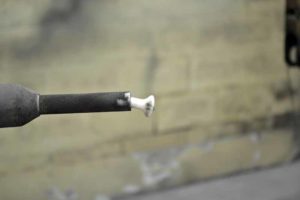 Here I have moved the tip to one side in the gun in order to direct the powder to one side.
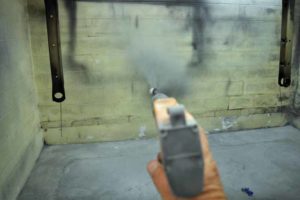 With the tip to one side, the spray pattern is altered. Note the powder is only coming out of one side now and is in the shape of half a cone.
If you hear any crackling (like spark jumping the gap in a spark plug), the gun is too close to the piece or the voltage is too high or you do not have a good ground
Let’s talk a little bit about how powder acts when spraying and some ways to get it to do what you want. As I have said before this is an electrostatic process. The powder is charged with a positive charge and drawn to an object that has a negative property.
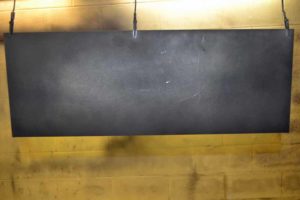 If you hang a flat piece of metal up and make even passes across the surface, what happens is the positively charged powder is drawn to the edges of the negative object. That is because the easiest place to attracted powder is to the sharp edge of the object.
What you do to counteract this is work from the center out. This gives a more even coat. Also note the alligator clip in the center of the top edge. You can clearly see how the powder was kept away from the surface. This is the same effect I was talking about earlier using hooks. Moving the clip or reducing the voltage allows you to coat that area.
Look at the images below. Note how the area around the valley on the control arm is coated, but the valley itself is not. This is an example of the Faraday Cage Effect. The Faraday Cage Effect is like an invisible electrical screen that prevents charged powder particles from reaching recesses.
What is the Faraday cage effect? The Faraday cage effect occurs when surfaces closer to the gun attract the powder before it can penetrate into corners and recessed areas. There are some ways to overcome this effect. You may find you have to do one or some portion of all of them to get a good coating in hard to reach areas:
1. One method of getting powder into difficult areas is to heat the object to be coated first and then spray the powder onto the hot substrate. This can help, but can also create other problems. It is very easy to misjudge the amount of power being applied and apply excess powder which can result in runs caused by the excess powder. I have tried this and it is the only time I have had a run. I do not recommend this process, but it may work for you.
2. Another way to over come the Faraday Cage Effect is to reduce the amount of voltage at the tip of the gun. You can do this two ways: one at the control unit and second by removing the ground wire to the object being coated. I do this and and combined with the next three methods, it works well for me.
3. Tip the tip of the nozzle or use a different shape nozzle to produce a flat spray pattern directing the powder more directly into the recess.
4. Increase the powder velocity. Indirectly, this also increases the amount of powder coming out of the gun. You have to be careful as you have reduced the voltage, the sticking ability of the powder, and with the increased air velocity, you can actually blow the powder off the surface of the object to be coated.
5. Change the spray angle. 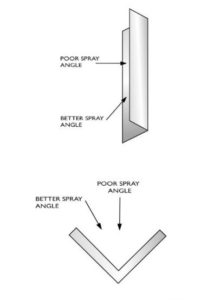 Instead of spraying directly into the inside corner or recess, use a more oblique angle.
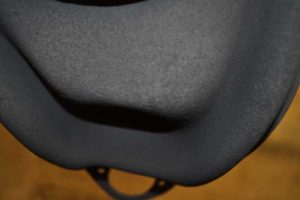 Another problem occurs if the voltage is too high or the nozzle is too close. The powder coat on the surface of the object to be coated will become pock marked or mottled. The solution is to reduce the voltage and/or move the tip of the gun farther away from the object to be coated
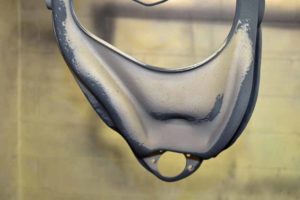 One of the great advantages of powder coat is that if you make a mistake you can simply blow the powder off the object and start over. Remember that by blowing air across the surfaces of the object you can give it a charge. Just be gentle or clean it completely and stick it back in the oven for 15 minutes
How thick should the powder coat be? This will really depend on what you are doing. For example, the racks in dishwashers are powder coated and those thickness are why beyond what you would attempt on a normal piece.
The standard powder thickness for most applications is between 60 and 80 microns (~2-3 mils).
Gauges are available to use to verify powder thickness. These vary from a very simple “rake” that you drag across the surface with notches to indicate depth to electronic digital readout gadgets.
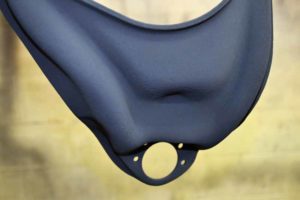 After a while, you will be able tell by looking at the appearance of the powder on the object. When the powder is at the correct depth, it takes on the appearance of felt cloth (soft and fuzzy looking).
Time to put it into the oven to cure. Two tricks I use:
1. Have the oven temperature a couple of degrees hotter than the recommended cure temperature. If a powder cures at 400 degrees Fahrenheit, I have the temperature set to 409.
2. Having the oven preheated helps the powder to flow to produce a nice finish and also reduces the amount of time to cure the powder
Resist the urge to open the oven door to see how that piece is looking. This lowers the temperature in the oven and the piece will take longer to cure.
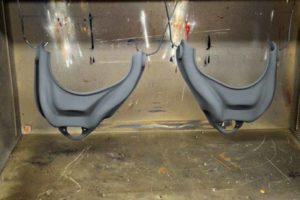 Remember cure time is determined by object temperature not the oven temperature
 Once it is out of the oven and cooled, inspect the result. If you find something you do not like, sand that area with 120 grit sandpaper, blow it off, and just recoat the whole piece. Also remember that powder coat does not hide imperfections such as rust pits, if anything it accentuates them.
When doing multiple coats let the object return to room temperature before starting the second, third or fourth coat. You can apply many coats as you like, but each coat adds thickness. The thicker the coat, the easier it is to crack the finish. In general, and unless I’m looking for a semi-gloss finish, I always follow up with a coat of gloss clear. It adds depth to the finish and minimizes visible scratches.
I’m sure I have forgotten some things
